Add Row
Add Element
Tree Guardian News
update
Tree Guardian News
update
Add Element
  • Home
  • Categories
    • Storm Damage & Prevention
    • Tree Care Tips & Landscaping
    • Tree Disease Identification & Treatment
    • Insurance Intel
    • DIY Tree Care & Safety
    • Sustainable Tree Care & Eco Solutions
    • Professional Tree Services
    • Arborist Stories
    • Latest News
    • Industry Insights
Arborist Get Featured 
  • update
  • update
  • update
  • update
  • update
  • update
  • update
July 10.2025
1 Minute Read

Unveil the Secret of Stump Grinding for a Clean Yard

What if one overlooked tree stump could attract more than 30 species of insects and fungi, putting your entire garden’s health at risk? Stump grinding isn’t just about looks—it's a vital solution for a vibrant, safe, and welcoming yard. In this comprehensive guide, you'll uncover the secrets of effective stump grinding, see why it matters, and get easy-to-follow steps for reclaiming your outdoor sanctuary.

Stump Grinding: The Surprising Impact on a Pristine Yard

  • Did you know a single rotting tree stump can attract over 30 species of insects and fungi, severely impacting your garden's health? Discover why stump grinding isn’t just aesthetic—it's a vital yard solution.

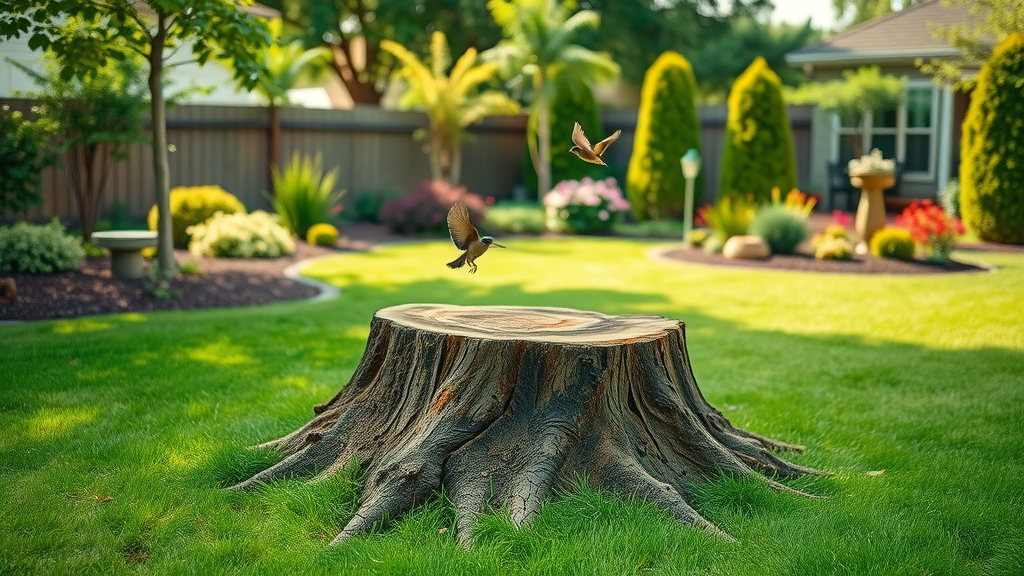
The presence of old tree stumps is more than a mere inconvenience—in fact, they can harbor pests, create tripping hazards, and spoil the look of your landscape. Left unchecked, a decaying stump becomes a magnet for destructive insects and harmful fungi that quickly spread to healthy plants and even your home’s foundation. Stump grinding acts as a shield, removing this risk and restoring both beauty and safety to your property.

By choosing to stump grind rather than ignore the problem or opt for complete stump removal , you’ll not only improve your yard’s appearance but also protect the underlying ecosystem. Advanced stump grinders make this process efficient, while also preventing regrowth and discouraging pests from taking up residence in the remains. The difference is immediate: a clean, safe yard free from hazards and invasions.

lush residential backyard with freshly ground tree stump area vibrant greenery clean yard after stump grinding

Achieving a Clean Yard with Stump Grinding: Goals and Benefits

  • How stump grinding transforms outdoor spaces
  • Safety and property value improvements
  • Eco-friendly advantages of modern stump grinders
  • Preventing tree stump regrowth and pest issues

Stump grinding does much more than erase an eyesore—it catalyzes total landscape rejuvenation. By grinding a stump to below ground level , you seamlessly integrate the space back into your lawn or garden bed. This transformation creates new possibilities for planting, landscaping, or hosting outdoor activities. No more dodging around a hard stump or dealing with disruptive tree roots. Instead, a well-executed stump grind puts control of your yard firmly back in your hands.

Safety is another massive benefit. Old tree stumps are a frequent cause of household trips and falls—especially for children and visitors. By eliminating these hazards, your property instantly becomes safer. At the same time, property value increases. A clean, obstacle-free lawn is more attractive to buyers and reflects responsible ownership, boosting your home’s marketability. Plus, using advanced stump grinders is environmentally friendly, as they minimize soil disruption, allow repurposing of wood chips , and prevent harmful chemicals from leaching into your garden.

The eco-benefits continue as modern stump grinding methods curb regrowth—eliminating the chance a tree will sprout from its roots. Removing the stump reduces the habitat for pests and disease spreaders, ensuring the rest of your landscape thrives. Overall, a clean yard from stump grinding isn’t just a visual upgrade; it’s a smart, green, and safe investment.

When planning your yard improvements, it's also wise to consider the broader costs associated with professional tree care. For a detailed look at budgeting and what to expect from expert services, explore this comprehensive guide on tree service costs and how to plan for professional care .

Stump Grinding Defined: What Does the Process Entail?

  • Core steps of stump grinding
  • Comparison to traditional stump removal
  • Use of advanced stump grinders

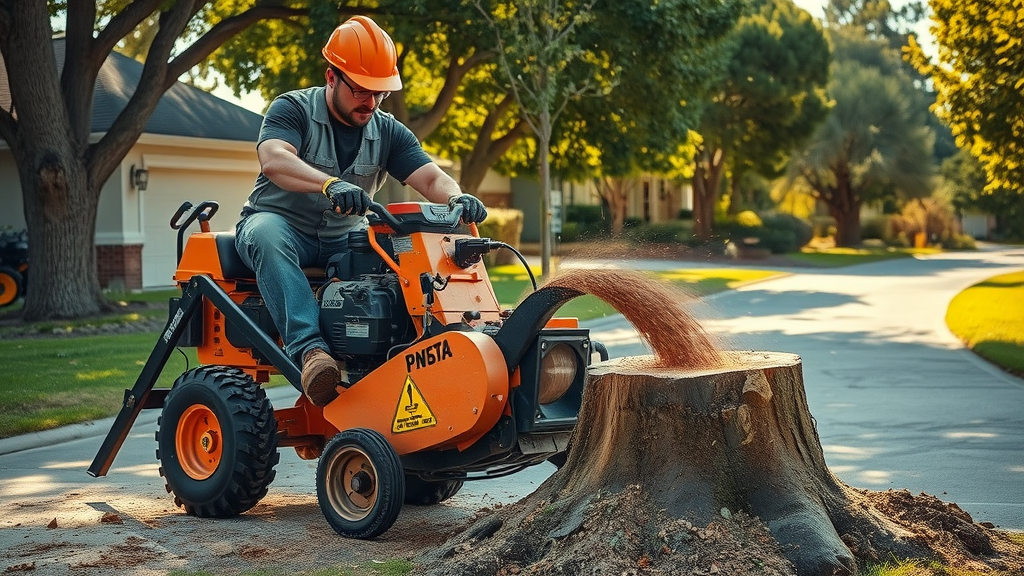
The stump grinding process starts with a straightforward goal: reduce the protruding wood of a tree stump and accompanying roots well below the surface of the soil. A professional operator or skilled DIYer uses a stump grinder —a machine equipped with a high-speed rotating blade or cutting wheel. The device chips away the wood piece-by-piece, turning it into usable mulch or wood chips in minutes. The area is then left even with the surrounding ground, blending seamlessly with the rest of your yard.

In contrast, traditional stump removal employs heavy machinery and often entails digging out the entire mass of roots as well as the stump, resulting in significant disturbance to soil, landscaping, and sometimes underground utilities. While both methods have their place, stump grinding is favored for its precision, minimal invasion, and faster recovery times for your landscape. Advanced machines—ranging from walk-behind models for tight urban spaces to heavy-duty self-propelled grinders—make the job safer and more efficient than ever.

powerful stump grinder machine operator grinding away tree stump safety gear residential yard stump grinding

Stump Grinding vs. Stump Removal: Which Method is Best?

"While stump grinding leaves your yard intact, traditional removal often results in major disruption and higher costs."
  • Key differences between stump grind and stump removal
  • Situations where stump grinding excels
  • Evaluating long-term yard impacts

Choosing between stump grinding and stump removal often depends on yard goals and the condition of your landscape. With stump grinding, the process focuses on eradicating the visible portion of the stump quickly and efficiently. The grinder’s rotating blade eats away at the wood, turning it into mulch, and leaves the underground roots undisturbed. This method causes minimal damage to lawns, paths, and irrigation systems, allowing for easy landscaping right after the grinding process .

Conversely, stump removal is far more disruptive. It requires powerful heavy machinery to uproot not only the main stump but an extensive web of roots. This can create large holes, damage adjacent plants, and increase the need (and cost) of repairs to the landscape. Removal should be considered only in cases of severe disease, future construction, or when the complete root system must be eliminated for new building projects.

If your goal is a fast, clean, and eco-friendly solution, stump grinding is ideal. It’s particularly well-suited for yards with multiple stumps, established lawns, and gardens where minimal disruption is important. For most homeowners, grinding delivers the pristine look they seek without the long-term scars and costs associated with full stump removal.

Types of Stump Grinders: Choosing the Right Equipment

  • Walk-behind, self-propelled, and track stump grinders
  • Matching stump grinder type to your yard's needs
  • Professional vs. DIY stump grinding

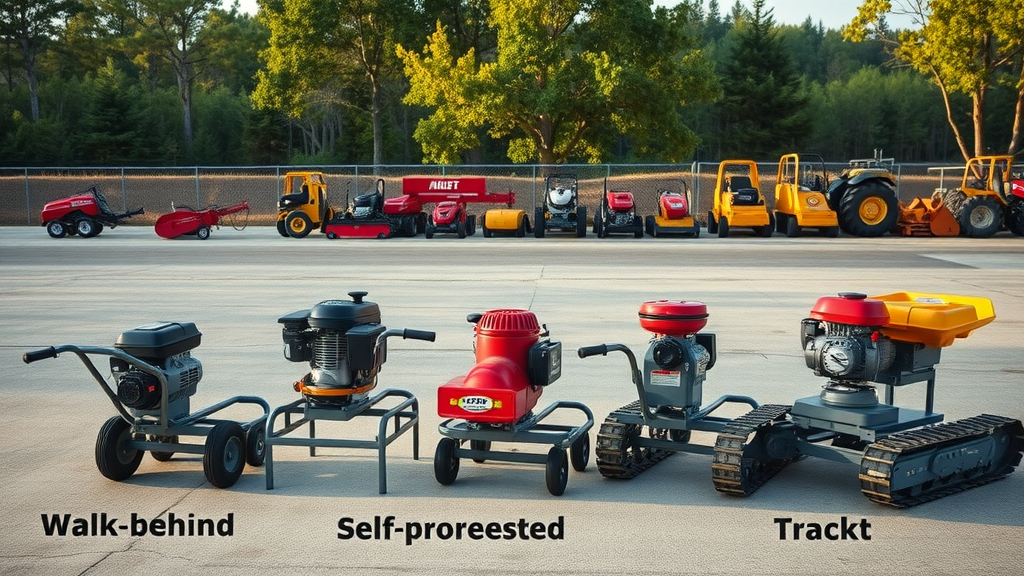
There’s an array of stump grinders available, each suited to different needs and yard sizes. Walk-behind stump grinders are compact and maneuverable, making them perfect for small stumps , tight spots, or DIY projects where minimal soil disruption is needed. For mid-sized jobs, self-propelled stump grinders offer increased power and efficiency; these are commonly used by landscaping professionals tackling average residential properties.

When dealing with large stumps or difficult terrain, track stump grinders are preferred. Their wide tracks distribute weight evenly, allowing the machine to easily move over muddy or uneven ground with minimal damage to lawns or gardens. Choosing the right grinder depends on the tree stump size, access to the area, and the final landscaping plan. While homeowners may consider renting a stump grinder for a DIY job, professional-grade machines deliver better results for large-scale or complex grinding tasks.

If considering a DIY approach, remember operating heavy machinery like a stump grinder requires skill and caution. Renting equipment involves understanding the grinder’s controls, safety protocols, and the physical demands of maneuvering the machine—consider the risks, like hitting underground utilities or incomplete removal. For most, hiring a professional grinding service ensures thorough work, safety, and optimal site restoration.

variety of stump grinders walk-behind self-propelled track types comparison outdoor equipment

Should You Rent a Stump Grinder or Hire Experts?

  • Renting a stump grinder: cost and complexity
  • Assessing risks of DIY vs. hiring a grinding service
  • When a professional stump grinding service is the best investment

Renting a stump grinder is tempting for the DIY-minded homeowner who’s looking to save money and tackle a yard project head-on. Rentals typically cost between $90 and $200 per day—enough to handle a small stump or two if you’re experienced with outdoor machinery. However, DIY jobs can get complicated by equipment complexity, the need for safety gear, and the risk of damaging underground features or leaving roots behind that could cause regrowth. It also demands physical effort, and the cost may rise with multiple stumps or labor-intensive locations.

Weighing the risks of DIY versus hiring a grinding service , most homeowners find value in expertise. Professionals have access to advanced stump grinders , apply best-practices for public safety, and usually include debris cleanup in the stump grinding cost . When dealing with large, deep, or multiple stumps—or when underground utilities are a concern—professional services minimize property risk and ensure a complete job. Plus, reputable companies carry insurance, offering peace of mind if unexpected issues arise.

Ultimately, the best investment depends on your comfort with specialized equipment , the number and size of stumps, and your willingness to take on labor and risk. For delicate landscapes, safety, or multiple stumps, trusting a skilled professional is almost always the wiser—and ultimately more cost-effective—choice.

Step-by-Step Guide to Stump Grinding for a Clean Yard

  • Site preparation and safety
  • Operating the stump grinder effectively
  • Cleaning up and repurposing grinding debris

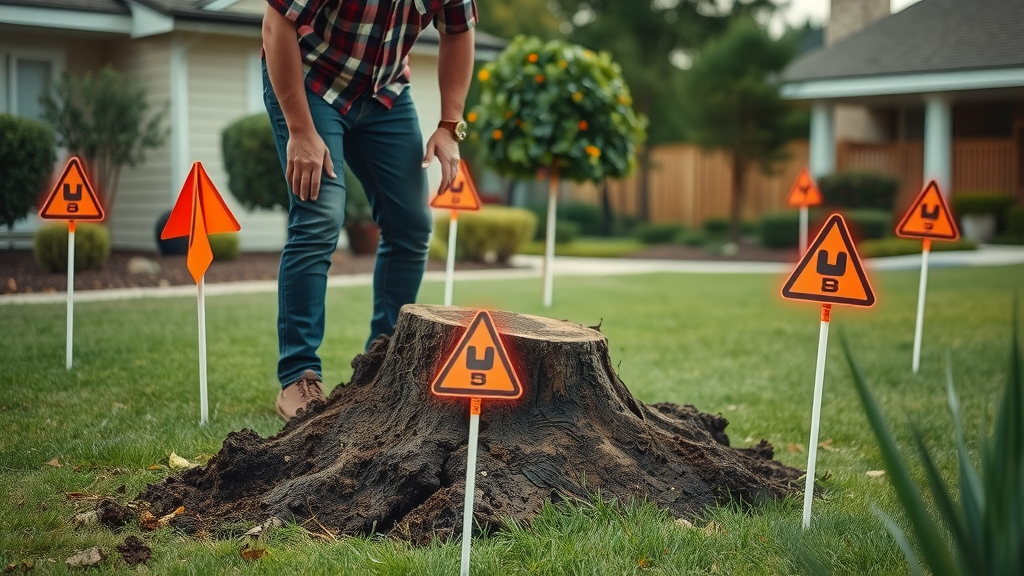
Ready to restore your space? The ideal stump grinding process begins with smart preparation. First, remove any rocks, garden decorations, or debris from the area. Mark nearby underground utilities and keep children and pets at a safe distance. Don your safety gear: helmet, goggles, ear protection, gloves, and sturdy boots are all essential before starting up the stump grinder .

Position your machine close to the tree stump —always on stable, level ground. Start the grinder and, following the manufacturer’s instructions, carefully lower the rotating blade onto the wood. Work the grinder side-to-side, steadily shaving away layers of the stump until it’s well below the soil’s surface. The result: a pile of fine wood chips , and a smooth area ready for landscaping.

To finish, rake the wood debris into a pile and use it as mulch for garden beds or pathways, or haul it away per your recycling plan. Fill in the hole with topsoil, tamp lightly, and sprinkle grass seed or plantings as desired. With each step, you’re not merely removing an obstacle—you’re kickstarting your yard’s renewal and supporting a clean, healthy landscape.

Watch a Stump Grinding Professional at Work: See the Complete Process

Stump Grinding Cost Breakdown: Factors and Comparisons

Average Stump Grinding and Removal Costs
Service Type Average Cost per Stump Additional Fees
Professional Stump Grinding $100–$400 Hauling debris: $50+
Stump Removal $350–$700 Landscape repair: $100+
Stump Grinder Rental $90–$200 per day Fuel/transport: $30+

Understanding stump grinding cost helps you budget and compare services. Professionals generally charge $100–$400 per stump, which includes labor and cleanup. If you opt for stump removal , expect $350–$700 per stump—plus potential fees for landscaping repairs. Stump grinder rental costs range from $90 to $200 per day, plus any necessary supplies and transport. The actual price will depend on factors like stump size, wood hardness, location, ease of access, and whether debris removal is included.

Long-term, stump grinding may be more cost-effective, considering it’s less invasive and requires less restoration after the work is done. Always compare several quotes, clarify what's included, and ask about any volume discounts for multiple stumps to maximize your savings while achieving a pristine yard.

How Stump Size and Tree Type Affect Stump Grinding Cost

  • Influence of stump diameter and wood hardness
  • Multiple tree stumps: volume discounts and considerations

The grinding cost of removing a stump is directly tied to its size and type. A large diameter stump or one from a dense, hardwood tree like oak or hickory will require more time and put more strain on the stump grinder . This may increase the overall fee, compared to softer wood species. The location and accessibility of the stump also matter—tight corners or sloped yards are often more labor intensive and therefore, more expensive.

If you have several tree stumps needing attention, many contractors offer volume discounts. Grinding multiple stumps at once saves on setup and travel, and most reputable grinding services will factor in a reduced per-stump rate for jobs that involve clearing an entire yard. Always discuss discounts upfront and clarify whether cleanup and restoration—such as refilling holes or applying mulch—are included in the base rate.

Common Mistakes to Avoid During Stump Grinding

  • Incomplete grinding and hidden tree roots
  • Damaging underground utilities
  • Safety oversights with stump grinders

A successful stump grinding project requires attention to more than just the visible wood. One common error is failing to grind deep enough or overlooking lateral roots, which can sprout new shoots or attract pests if not fully addressed. Another risk is neglecting to check for underground utilities; a misdirected grinder can easily cut into pipelines or wiring, leading to costly and dangerous repairs.

Negligence around equipment is equally serious. Without the proper safety gear—helmet, goggles, ear shields, gloves, and boots—injuries can occur quickly. In addition, leaving pets or children nearby is a recipe for disaster. Proper planning, marking utility lines, and taking every safety precaution ensures both effective results and a hazard-free experience for everyone on site.

cautionary garden scene homeowner hesitating beside partially ground stump with utility marker flags and roots visible stump grinding safety

Stump Grinding Safety: Essential Tips

  • Safety gear for using stump grinders
  • Precautions for children and pets

Personal safety is paramount during any stump grinding task. Always begin with the right gear: a helmet and face shield, safety glasses, heavy-duty gloves, ear protection, and steel-toed boots. Never operate a stump grinder in loose or inappropriate clothing—long pants and close-fitting attire help prevent snags and injuries. Before powering up, carefully read the machine's manual and ensure you understand all controls and emergency shutoff mechanisms.

In addition to personal safety, keep children and pets at a considerable distance from the working area. Set up visual barriers or temporary fencing to emphasize the danger zone. After grinding, thoroughly check the site for hidden wood fragments or roots before allowing anyone back. These simple steps ensure everyone remains safe and injury-free—especially important in busy family yards.

stump grinding safety gear helmet goggles gloves boots illustration child and pet safety lawn background

After Stump Grinding: Restoring and Revitalizing Your Yard

  • Filling in grinding holes after a stump grind
  • Using mulch from the grinding process
  • Reseeding and landscaping tips

Once the stump grind is complete, attention turns to repairing and enhancing the landscape. Start by clearing away excess wood chips —these can be reused as mulch in flowerbeds or garden paths to nurture plant growth and retain soil moisture. For the former stump hole, fill in with clean topsoil, tamp it gently, and smooth the surface to match your yard’s natural contour.

The next step is to reseed the area with grass or lay down new sod, ensuring quick regrowth and a uniform look. If you’re aiming for even more curb appeal, now’s the perfect opportunity to landscape creatively—add a garden bed, plant a bright cluster of flowers, or create a new patio area where the tree stump once stood. With diligent aftercare, your yard not only recovers but becomes more beautiful and functional than before.

freshly mulched garden bed with grass seed topsoil filled into former stump hole after stump grinding restoration

When to Choose Stump Removal Over Stump Grinding

  • Cases requiring full root extraction
  • Major landscaping or construction plans
  • Weighing tree stump removal costs

While stump grinding suits most homeowners’ needs, some scenarios justify considering full stump removal . If you’re planning substantial construction—like a pool, new garage, or driveway—removing all root material is sometimes required for stability and safety. Certain tree diseases, like root rot or infestations, may also warrant complete extraction to prevent spread to other parts of your yard.

That said, tree stump removal is typically more invasive and expensive than grinding. It’s best reserved for when future plans absolutely demand root-free soil, or when the risk of microbial or pest issues outweighs the higher stump removal cost. For most upgrades or beautification projects, sticking with stump grinding ensures quicker recovery and less disruption to your landscape.

Environmental Impact: The Eco-Friendly Choice of Stump Grinding

  • Recycling stump grinding debris
  • Protecting soil and plant life
  • Sustainable yard practices

Choosing stump grinding is not just practical—it's also an environmentally sound decision. The process generates valuable wood chips and mulch, both of which enrich soil and conserve moisture when repurposed on-site. Grinding, as opposed to removal or chemical treatments, causes less soil disruption and preserves beneficial microorganisms and nearby plant roots, supporting a stable and thriving ecosystem.

By avoiding chemical stump removers and heavy excavation, grinding keeps your outdoor space healthier and reduces the carbon footprint associated with debris hauling. Sustainable yard management goes hand-in-hand with stump grinding —it’s a solution that nurtures your garden while respecting the broader environment.

Choosing a Reliable Stump Grinding Service: What to Look For

  • Credentials and insurance
  • Equipment quality and operator experience
  • Local customer reviews and guarantees

When it's time to hire a stump grinding service , look for licensed and insured providers who use modern, well-kept equipment. Credentials matter; check that the operator is experienced, trained, and follows all local regulations. Review online feedback and testimonials to confirm reliability, professionalism, and consistent results on previous jobs.

Also, clarify what’s included in the quoted price: Does it cover complete grinding, debris removal, and restoration, or just the grinding itself? Reputable services are transparent about guarantees and willing to answer all your questions. By selecting professionals with a proven track record, you’re far more likely to achieve the clean, beautiful yard you envision.

"Hiring a licensed and insured grinding service gives homeowners peace of mind and guaranteed results."

People Also Ask: Stump Grinding FAQs

How much does it cost to grind one stump?

  • The average cost to grind one stump ranges from $100 to $400, depending on the stump’s size, location, and wood type. Professional grinding services often include debris cleanup in the quote.

Is it worth it to grind a stump?

  • Yes, stump grinding is typically the fastest and most effective method to clear unsightly tree stumps, halt regrowth, prevent pests, and safeguard your property’s value.

How much does it cost to grind a tree stump out?

  • On average, grinding a tree stump out costs between $100 and $400. Costs can increase for larger or harder stumps, or if obstacles complicate the process.

How much does it cost to hire a stump grinder?

  • Renting a stump grinder typically ranges from $90 to $200 per day, while hiring a grinding service usually falls between $100 and $400 per stump, including labor and cleanup.

Quick Tips for Affordable and Effective Stump Grinding

  • Get multiple stump grinding quotes
  • Ask about volume discounts
  • Clarify what’s included in stump grinding cost
  • Verify grinding service insurance and local reputation

To get the best value in stump grinding cost , request several quotes from local providers and ask about price breaks for clearing multiple stumps. Always clarify whether the fee covers complete grinding, debris removal, and site restoration. Check references, insurance status, and service guarantees before hiring, and never hesitate to compare customer testimonials for peace of mind.

Get Started on Your Clean Yard: Partner With Experts in Stump Grinding

  • Ready to eliminate unsightly tree stumps and revitalize your yard? Contact trusted stump grinding professionals and reclaim your outdoor oasis today.

Don't let forgotten tree stumps undermine your property. Partner with a reputable stump grinding team, and start enjoying the clean, beautiful landscape you deserve—one grind at a time!

If you’re thinking about the bigger picture of protecting your property, it’s also important to understand how tree-related issues can impact your home insurance. For deeper insight into what’s covered when trees fall and how to navigate insurance claims, check out this essential resource on home insurance coverage for fallen trees . Exploring these topics will help you make informed decisions, safeguard your investment, and ensure your yard and home are both secure and beautifully maintained.

To further enhance your understanding of stump grinding and its benefits, consider exploring the following resources:

  • “What Is Stump Grinding?” : This article provides a comprehensive overview of the stump grinding process, detailing how specialized equipment is used to efficiently remove tree stumps and the advantages it offers, such as improved aesthetics and prevention of pest infestations. ( abbotttreecare.com )

  • “Stump Grinding vs. Removal: Which Is Better?” : This resource compares stump grinding and complete stump removal, discussing the pros and cons of each method to help you determine the best approach for your yard. ( angi.com )

By delving into these articles, you’ll gain valuable insights into the stump grinding process and be better equipped to make informed decisions for maintaining a clean and safe yard.

Tree Care Tips & Landscaping

739 Views

Write A Comment

*
*
Please complete the captcha to submit your comment.
Related Posts All Posts
04.11.2026

Dead Tree Identification in Spring: Spot Issues Fast

Is your tree truly waking up for spring—or hiding danger in plain sight? Discover how dead tree identification in spring protects your property before storms strike. Can You Spot Trouble Early? Why Dead Tree Identification in Spring Matters Spring’s arrival should bring a flush of green leaves and renewed life to your yard. But not all trees wake up for the season—some stay stubbornly bare, masking real hazards. Dead tree identification in spring is more than just a matter of curb appeal; it’s vital to protecting your home, property, and family from the ravages of storms. When a tree is dead or dying, it loses the resilience healthy trees possess to withstand wind and rain, posing a serious safety risk as storms approach. Homeowners and property managers who act fast by learning to identify trees in trouble can save thousands in storm-related damages and avoid catastrophe. Early recognition means you can arrange tree removal or professional assessment before rotting branches or unstable trunks become a direct threat. By checking for warning signs in spring—well before summer storm season peaks—you ensure that hidden dangers like dead branches, fungal growth, or hollow trunks don’t have a chance to cause harm when gusty winds begin. Whether you’re new to tree care or a seasoned tree owner, tackling dead tree identification in spring should be a top priority for every responsible homeowner. What You'll Learn About Dead Tree Identification in Spring Recognizing the signs of a dead or dormant tree in spring Distinguishing between a tree that is dead, dying, or simply late to leaf out Key indicators that a dead tree might pose an urgent safety hazard Expert techniques for hands-on dead tree identification in spring How to act fast if you spot a dead or dying tree before storm season Understanding Dead or Dormant: Tree Life Cycles and Seasonal Clues How to Tell if Your Tree is Dead or Dormant in Spring Spotting seasonal dormancy vs. the appearance of a dead tree Springtime tree id: Bud break, green leaves, and growth signals Dead tree vs. dormant: Common misunderstandings Not every bare tree in early spring is in trouble. Many deciduous trees naturally drop or shed their leaves during fall and remain leafless through winter. Dormancy is a survival strategy where trees conserve energy until warm temperatures and longer days signal them to wake up. The key in dead tree identification in spring is being able to tell if your tree is simply slow to leaf out or actually lifeless. Look closely at your tree compared to others of the same species nearby. If most trees are showing healthy growth, bud break, and green leaves, but yours is still bare, it’s a red flag. Dormant trees might be slightly behind, but shouldn’t lag by more than a week or two. Be aware that some tree species, like oaks, leaf out later, so always compare against similar types. If in doubt, consult a certified arborist for expert help. Key Signs of a Dead Tree in Spring Recognizing Dead Wood and Dead Trees Absence of green leaves when other trees leaf out Brittle branches, peeling bark, and fungal growth Tree is dead: Testing twigs for life Dying tree: Warning signs before total decline Dead trees are easy to spot once you know what to look for. The clearest sign is the absence of green leaves while healthy trees nearby are leafing out. If spring has fully arrived but certain trees still sport bare branches, check for other symptoms like brittle branches that snap easily, peeling bark, or mushroom and fungal growth at the base. Fungal presence signals rot and decay, indicating the tree is dead or dying. Test suspected branches with a simple scratch test: gently scrape away a bit of bark on a small twig. If it’s green and moist underneath, the tree is alive. If it’s brown, brittle, and dry, the tree is dead or severely stressed. Dying trees might show partial leaf-out, thinning crowns, or areas with no new growth. Acting early can save property and even lives, especially as storms increase the risk of hazardous branches falling. While learning to spot dead or dying trees is crucial for storm safety, it's also important to consider how your overall landscape health can impact tree vitality. For example, advancements in smart irrigation technology are helping homeowners maintain healthier lawns and trees by delivering water more efficiently, which can reduce stress and disease in your landscape. Dead Trees vs. Dying Trees: Spotting the Difference Progression from Dying Tree to Dead Tree and Why It Matters Common symptoms of a tree is dying: wilting, thinning crown, leaf discoloration Evaluating dying tree branches and trunk health How a dying tree becomes hazardous in storm season The journey from dying tree to dead tree can be subtle yet dangerous. Dying trees often show warning signs long before they become fully lifeless, such as wilting leaves, a thinning crown, or sections with discolored foliage. These symptoms may be caused by diseases and pests, drought, or damage to roots and trunk. Pay close attention to the health of trunk and larger branches—vertical cracks, oozing sap, or visible wounds are causes for concern. A dying tree often still supports some living tissue, but compromised structure means branches can snap unexpectedly, especially during storms. As health declines, roots lose their anchoring power, turning the tree into a ticking time bomb. The difference between dead trees and dying trees comes down to urgency: Both require attention, but a dead tree or branch poses an immediate safety risk and should be addressed before severe weather strikes. Table: Quick Comparison – Dead or Dormant, Dying Tree, or Alive? Tree Condition Leaf/Bud Presence Branch Flexibility Bark Health Additional Signs Dead Tree None Brittle, snaps easily Peeling, cracking, falling off Fungal growth, hollow trunk, no green under scratch test Dormant Tree No leaves, healthy buds Flexible, bends without breaking Intact, firm Twigs green under scratch test Dying Tree Few leaves, discoloration, thin crown Some dead, some living Areas peeling, wounds visible Wilting, partial leaf-out, vertical cracks Tree is Alive Healthy, abundant green leaves and buds Very flexible, full growth Fully intact, vibrant No disease, strong structure Hands-On Dead Tree Identification in Spring: Step-by-Step Guide Inspect for green leaves and live buds Try the scratch test on twigs for signs of life Look for mushroom or fungus growth—dead tree warning Check branch flexibility and brittleness Observe bark color, cracks, and peeling Examine tree trunk for wounds or decay Use this practical guide to check your trees as soon as spring growth begins. Start by looking for green leaves and bud development; if they’re missing, compare with nearby healthy trees. Perform the scratch test to reveal a tree’s internal health. Mushrooms, shelf fungi, or conks at the trunk’s base signal that decay is advanced and likely irreversible. Check branches—healthy ones are flexible and resist breaking, while dead branches snap cleanly with little effort. Bark condition is essential; peeling, cracking, or falling bark usually means underlying tissues have died. Finally, inspect the trunk for wounds, holes, or soft, rotten areas. If you spot several symptoms, contact a certified arborist for an expert evaluation before storm season escalates the risk. Safety First: Addressing Dead Trees Before Storms Why Identifying a Dead or Dying Tree Is Crucial for Storm Damage Prevention Potential hazards of leaving dead trees standing How dead tree branches and weak roots threaten property Pre-storm mitigation: Acting quickly after dead tree identification in spring Dead or dying trees are accidents waiting to happen, posing a direct safety risk to homes, cars, utility lines, and anyone passing beneath. During storms, dead branches and rotting trunks can break away, while trees with weakened roots may topple altogether, causing costly or even irreparable damage. That’s why dead tree identification in spring is so critical—addressing these hazards early greatly reduces the chance of trouble when storm winds rise. Taking quick action—such as scheduling a professional evaluation and removal—protects both people and property. Pre-storm mitigation is more cost-effective than emergency response and can prevent tragic outcomes. Storm preparedness begins long before dark clouds gather; it starts with a careful look at every tree on your lot. Remember: a tree may look sound until stress from storms exposes hidden weaknesses, turning a manageable problem into an urgent safety emergency. Expert Insight: Arborist Quotes on Dead Tree Identification in Spring "Spring is when hidden risks become visible. Early dead tree identification is the first defense against preventable storm damage." – Certified Arborist "A dead or dying tree isn't just unsightly—it can become a safety emergency when storms hit." – Tree Care Specialist Lists: Common Springtime Tree ID Mistakes to Avoid Confusing dead trees with slow-leafing species Ignoring fungal growth or mushrooms at the base Overlooking brittle or hollow branches Not recognizing thinning crowns and premature leaf drop Dynamic walkthrough video showing step-by-step springtime dead tree identification: watch as an expert examines leaves, performs the scratch test, checks for fungal growth, and highlights hazard signs every homeowner should know. How-To Dead Tree Identification in Spring (Visual Examples) People Also Ask: Dead Tree Identification in Spring How to identify dead trees? Check for absence of green leaves, brittle branches, mushroom or fungus growth, and bark falling off. Scratch a twig to see if it's green inside; brown and dry means likely dead. Is it dead wood or deadwood? ‘Dead wood’ refers to specific dead branches or sections on a tree, while ‘deadwood’ can mean debris or any non-living wood. In dead tree identification in spring, both terms help spot problem areas. How to tell if a dead tree is about to fall? Warning signs include significant lean, exposed roots, soft or rotting base, and large cracks or cavities in the trunk. Dead trees near structures or walkways pose the highest risk. What does a dead or dying tree look like? A dead or dying tree will typically have few or no green leaves, extensive dead branches, cracking or peeling bark, and visible fungal growth. Dying trees may have partial leaf-out or thinning crowns. FAQs on Dead Tree Identification in Spring Can a tree recover from appearing dead in spring? Sometimes, a tree delayed by late frosts or specific species traits will leaf out later in spring. However, if there are no signs of life (no bud swell, total dryness, or fungal growth), recovery is unlikely. Consult a certified arborist if you are uncertain. Is it safe to remove a dead tree by yourself? Tree removal, especially when dead wood has compromised structure, can be extremely dangerous. It’s best—and often required by law—to use a professional arborist for safe removal. How often should homeowners check for dead trees? It’s wise to do a thorough inspection every spring and again after major storms. Regular checks keep your property safe and help catch problems before they become critical. Do some tree species leaf out later than others? Yes, tree species vary in timing. Oaks, hickories, and some other deciduous types may leaf out weeks later than maples or cherries. Always compare your tree to others of the same species in your area. Key Takeaways for Homeowners on Dead Tree Identification in Spring Early dead tree identification in spring prevents costly storm damage. Distinguish between dead, dying, and dormant trees with proven arborist techniques. Act promptly if you spot a dead or high-risk tree—your safety and property depend on it. Ready to Act? Get Expert Help for Dead Tree Identification in Spring Call us at 203-271-7991 or email us at robert@treeguardiannews.com for professional dead tree assessment and removal. Act now—don’t risk your safety by waiting. Identifying and removing dead trees before storm season is the best protection you can offer your home and loved ones. If you’re committed to keeping your landscape resilient year-round, consider how emerging technologies can further safeguard your property. Innovations like smart irrigation systems are transforming the way homeowners care for their lawns and trees, making it easier to maintain healthy root systems and prevent stress-related decline. To discover how the latest advancements in irrigation could complement your tree care efforts and help you stay ahead of seasonal challenges, explore our in-depth look at how Irrigreen’s smart irrigation technology is set to revolutionize lawn care. Investing in proactive solutions today means a safer, greener tomorrow for your home and landscape.

04.10.2026

Struggling with spring dead tree identification? Here’s help

Did you know? Homeowners lose thousands of healthy trees every year because they confuse a dormant tree for a dead one after winter — putting property, people, and landscapes at risk. This spring dead tree identification guide helps you quickly recognize dead or dying trees, so you can take action before your yard’s health and safety are compromised. A Startling Reality: Why Spring Dead Tree Identification Is Crucial for Recovery As spring breathes life into yards and forests, not every tree bounces back from winter’s harsh grip. The spring dead tree identification guide becomes invaluable when rapid seasonal changes leave some trees compromised. Dead or dying trees often go unnoticed until they show signs of decay, risking sudden limb drop or entire trees that can fall unexpectedly with the next heavy rain or wind. Spotting a dead tree as early as possible prevents its hidden risks from threatening nearby healthy trees, structures, or your family. Dead trees in spring are especially dangerous because winter damage and declining tree health become visually obvious just as people begin to use their outdoor spaces again. If left unchecked, a dying tree can disrupt your landscape, spread disease, and create a potential hazard right where you least expect it. Early identification and immediate action help ensure fast recovery, preserving the natural beauty, safety, and value of your property post-winter. Understanding Winter Damage and Its Effects on Dead Trees Winter brings freezing temperatures, heavy snow, and ice, all of which can damage a tree’s roots, trunk, and branches. By spring, the signs of winter’s toll—such as cracked bark, peeling bark, or limp, dead branches—can signal trouble. Sometimes, otherwise healthy-looking trees can appear lifeless due to internal injuries or compromised root systems. Recognizing these issues early is crucial: waiting until later seasons may be too late for recovery. The spring dead tree identification guide ensures homeowners and landscapers aren’t caught off guard by the lingering effects of winter’s destructive reach. Prolonged cold snaps can kill young roots or weaken older ones, leaving the tree unable to take up water and nutrients as the ground thaws. Fungal growth often appears on bark or at the base of the tree, exploiting wounds made by snow or ice—a sure warning that decay is taking hold. Dead or dying trees also attract insects and pests, compounding the threat to your landscape. Knowing the difference between winter dormancy and true mortality is the first step to maintaining a healthy tree population this spring. “Trees that suffer unnoticed damage over winter may become hazardous by spring — timely dead tree identification is vital.” What You'll Learn from This Spring Dead Tree Identification Guide Key signs a tree is dead or dying How to differentiate between a dead tree and a dormant or stressed tree Practical steps in your tree identification process What actions to take once you’ve identified a dead or dying tree Table: Quick Reference for Spring Dead Tree Identification Signals Visual Signal What It Means Action Needed No green leaves in spring Possible dead tree Conduct scratch test Fungal growth on bark Possible dying tree Inspect root and trunk stability Cracked or brittle branches Indicator dead or dying tree Prune/test for live tissue How to Identify a Dead Tree in Spring: Step-by-Step Guide Visual Cues: Spotting a Tree Dead from a Distance Begin your spring dead tree identification walk by visually comparing your trees to others in the landscape. Dead or dying trees stand out when neighboring trees boast lush, green leaves while one remains barren. A tree that fails to sprout green leaves long after others have, especially in favorable spring weather, is signaling a problem. Similarly, if you see bark falling off in sheets or patches, or you notice mushrooms growing on the trunk or at the base of the tree, these are classic signs of decay and compromised tree health. Additionally, look for obvious signs of physical trauma, such as branches snapped or split from winter storms. If the tree’s silhouette shows sparse or brittle branches, missing bark, or unusual discoloration, it could be more than just slow to awaken; it might be dead or dying. Comparing these cues with those of a healthy tree nearby can help determine whether you’re seeing natural variance or clear indications of tree mortality. Early recognition—before summer storms arrive—is key to managing any potential hazard. No green leaves while surrounding trees flourish Bark falling off or excessive fungal growth Visible structural damage from winter storms The Scratch Test: Quick Confirmation for Tree Is Dead or Alive If you can’t immediately determine whether a tree is dead, the scratch test is a simple yet reliable way to check for vital life signs. Using a utility knife or your thumbnail, gently scrape away a thin layer of bark from a small twig or a lower branch. If you find moist, green tissue beneath the outer layer, your tree is alive. If the layer underneath is dry and brown, the tree is likely dead. This test is quick, non-destructive, and highly effective in differentiating between genuine mortality and a late-blooming healthy tree. Be sure to select a twig or section of bark that seems healthy—avoid dead, brittle branches that are already shedding bark, as these won’t reflect the overall state of the tree. Perform the scratch test on different areas of the tree if you discover mixed results, especially on larger specimens. A healthy root system will distribute moisture and keep the inner bark green, while a dying tree that has lost its root health will turn brown and dry from the inside out. For maximum accuracy, combine the scratch test with other visual cues outlined in this identification guide. How to perform a scratch test accurately Interpreting the color and moisture of inner bark Assessing Tree Health: Signs Your Tree Is Alive Versus Dead or Dying A healthy tree will display emerging buds, flexible branches, and vibrant green leaves as spring progresses. The distinction between dormant, stressed, and dying trees is often in these small details. Buds on living trees should feel supple and eventually burst into leaf; in contrast, a dying tree might show shriveled or missing buds altogether. Flexibility is a good indicator of life; living branches usually bend without snapping, while those on a dead tree break easily, indicating no moisture or sap within. Assess other vital indicators, such as firmness of the trunk and the state of the bark. A tree with soft, punky wood, deep cracks running up the trunk, or peeling bark may be past the point of recovery. Fungus growing at the base or in cracks is another bad sign, as it often signals irreversible decay in the root system. Use a combination of these methods—comparing leaves, checking flexibility, and performing the scratch test—for the most accurate spring dead tree identification. Look for bud development and green leaves Check branches for flexibility and moisture Living Versus Dead: How to Differentiate Between a Dormant or Dying Tree After harsh winters, many trees and shrubs may appear lifeless, but a careful eye can tell dormant survivors from true fatalities. Dormant trees often resume growth as temperatures rise, but a dead or dying tree will not, regardless of changes in weather. Look for seasonal cues: Do the buds swell and leaf out as spring progresses, or do branches remain bare and brittle? Conduct the scratch test if you’re unsure whether the tree is simply late waking up or genuinely gone. Fungal growth, especially at the base of the tree or on areas of peeling bark, typically signals decay rather than stress or simple dormancy. Likewise, brittle branches and significant bark loss are more consistent with a dead tree than a healthy tree emerging from winter rest. By following this guide, you’ll avoid common misidentifications and take appropriate action to maintain the vitality of your landscape. Seasonal cues and common misidentifications after harsh winters Role of fungal growth and bark condition Common Causes of Springtime Dead or Dying Trees A tree that does not recover in spring may have succumbed to winter frost damage, root injury, pests, or fungal infection. Winter frost damage can create deep cracks in bark and disrupt the tree’s internal plumbing, leaving it unable to transport water even after thaw. Root injury from freezing—often invisible at the surface—prevents moisture from reaching up to the branches, hastening dieback once growth resumes. Sometimes, signs of pest infestations only become apparent as the weather warms, with boreholes, sawdust, or sudden leaf loss. Persistent fungal growth at the base or along the trunk signals that decay has set in, feeding on dying tissues and accelerating the decline. These factors act together, preying on weakened or injured trees and overwhelming their ability to bounce back after winter. By using this spring dead tree identification guide to recognize these causes early, you improve your chances of saving stressed trees or replacing dead ones before they become dangerous liabilities. Winter frost damage Root injury from freezing Pest infestations revealed after thaw Persistent fungal growth When to Worry: Warning Signs a Dead or Dying Tree Might Be Hazardous Some dead or dying trees go from unsightly to dangerous overnight. Key signals that a tree dead poses a risk include cracking at the base of the tree or along the trunk, especially if the tree leans unnaturally or the ground has shifted. Large dead branches overhanging roofs, play areas, or driveways are an immediate red flag: they can break loose without warning, especially during spring storms or wind. Don’t underestimate the potential hazard; trees in this condition can fall unexpectedly, causing property damage or even injury. If you spot any of these warning signs during your spring assessment, act quickly. Immediate pruning or removal by a certified arborist is necessary to keep your property, family, and neighbors safe. Document the problem, avoid standing or parking beneath the dead or dying tree, and prioritize these hazardous cases in your spring maintenance plans. Cracking at the base or trunk Leaning unnaturally Large dead limbs over structures Key Actions: What to Do if You Find a Dead Tree This Spring If your spring dead tree identification process points to a confirmed dead or dying tree, your priority is safety. Begin by consulting a certified arborist to assess the tree’s stability and the best removal strategy. Attempting to prune or remove a large dead tree without proper knowledge or safety gear is risky—trunks can snap, and limbs may fall unexpectedly. A professional can identify hidden dangers, use the right equipment, and safely remove hazardous trees. For smaller trees or dead branches, you can increase safety by following recommended trimming practices: wear high-visibility safety gear, clear the area around the tree, and never attempt to remove limbs that overhang structures. Dispose of material following local regulations to prevent disease or pests from spreading in the neighborhood. Above all, act quickly once you confirm a tree is dead—swift removal helps protect your property and the broader landscape from further harm. Consulting a certified arborist after using this spring dead tree identification guide Safe trimming and removal best practices While identifying dead or dying trees is essential for landscape safety, it's equally important to consider how your overall yard care practices can impact tree health. For example, advancements in smart irrigation technology can help prevent stress and decline in trees by ensuring they receive optimal water throughout the growing season. Discover how innovative solutions are shaping the future of lawn and tree care in this overview of Irrigreen's smart irrigation breakthroughs. Lists: Essential Tools for Accurate Spring Dead Tree Identification Sharp pruning shears Utility knife for scratch test High-visibility safety gear People Also Ask About Spring Dead Tree Identification Guide What is the 10/20/30 rule for trees? The 10/20/30 rule is a tree diversity guideline, suggesting no more than 10% of a single species, 20% of a single genus, or 30% of a single family to prevent widespread losses from disease or pests. While not directly linked to dead tree identification, it helps avoid mass dieback. How to identify a dead tree? Identifying a dead tree involves evaluating leaf budding in spring, checking for green leaves or brittle branches, performing the scratch test, and assessing for fungal growth or significant bark loss. If all indicators suggest lifelessness, use a professional identification guide for confirmation. What is the 5 15 90 rule tree felling? The 5 15 90 rule is a guideline for felling trees: 5% of trees should be large, mature specimens; 15% should be young, and the remaining 90% should be middle-aged. This is a forest management practice and does not directly apply to spring dead tree identification, but healthy age distribution helps reduce dead or dying trees. How to tell if a dead tree is about to fall? Warning signs that a dead tree is about to fall include newly formed leans, cracked soil around the base, audible creaks or pops, and sudden structural splits after winter. If you identify these signs during your spring dead tree identification inspection, contact an arborist immediately. FAQs: Spring Dead Tree Identification Guide Essentials Can a tree recover after appearing dead in spring? Sometimes trees can appear lifeless but are simply delayed by a long winter or stress. Wait until neighboring healthy trees have fully leafed out, then check for bud and bark vitality. If the scratch test and visual inspection show no signs of life, removal is likely needed. Are all fungal growths a sign that a tree is dying? Not all fungi are a death sentence—some appear on minor wounds or decaying wood. However, mushrooms or large fungal growths at the base or trunk of a tree, especially with other decay symptoms, usually signal internal rot and a dying tree. What should I do before removing a dead tree identified this spring? Always confirm death using several identification methods—scratch test, visual cues, and branch flexibility. Consult a professional arborist for safe removal, especially for large trees or those close to property and people. Key Takeaways from This Spring Dead Tree Identification Guide Early detection of dead or dying trees is critical for property and landscape health after winter The scratch test, leaf and bark inspection, and comparison with neighboring trees are vital steps Seek professional guidance for safe removal and hazard mitigation Ensure Safe Recovery: Contact Certified Arborists for Dead or Dying Tree Management Arborists get noticed! Call 203-271-7991 Conclusion: By following this spring dead tree identification guide, you protect your property and ensure a swift, healthy recovery of your landscape after a harsh winter. Don’t delay—early identification saves trees, time, and lives. As you continue to care for your landscape this season, remember that proactive solutions can make all the difference in preventing future tree loss and maintaining a thriving yard. Embracing new technologies, such as smart irrigation systems, not only supports tree health but also optimizes water use and sustainability for your entire property. If you're interested in learning how cutting-edge innovations are transforming lawn care and tree vitality, explore the broader impact of smart irrigation advancements and what they could mean for your landscape’s long-term resilience by reading about Irrigreen's vision for the future of lawn and tree care. Investing in smarter care today can help ensure your trees remain healthy and vibrant for years to come. Sources Tree Care Tips: How to Tell if a Tree is Dead or Dying University of Minnesota Extension: How Do You Tell if a Tree is Dead? Arbor Day Foundation: Tree Identification and Health Resources

04.08.2026

Spring Tree Care Checklist for Homeowners: Essential Tips Now

Did you know that proper spring tree care can reduce risk of disease and storm damage by up to 60%? Taking charge of your trees every spring can transform your yard, protect your investment, and lead to healthier trees throughout the growing season. This spring tree care checklist for homeowners is your one-stop solution to ensuring your landscape flourishes beautifully. Get ready to take a proactive approach and discover the expert-backed steps that protect, nourish, and enhance your trees—starting right now. Why a Spring Tree Care Checklist for Homeowners Is Critical "Did you know that proper spring tree care can reduce risk of disease and storm damage by up to 60%?" Spring is a pivotal season for trees, as the combination of warming temperatures, new growth, and increased moisture makes it an ideal time for both nurturing healthy development and minimizing threats. As a property owner, following a dedicated spring tree care checklist for homeowners helps prevent serious issues like broken branches, pest infestations, and diseases that are far more expensive to address once they’ve taken hold. The spring tree care period is also an important time to assess and remedy damage sustained during harsh winter storms. For both residential and commercial properties, a little attention now means fewer emergencies later, and routine tree care reduces the chances of property damage or landscape loss. In short, a tree care checklist is a homeowner’s best tool for promoting healthy trees during the growing season and beyond. Observing Spring Growth and Early Tree Health Assessment Check for new buds Inspect branches for frost damage Monitor leaf color changes When spring arrives and temperatures rise, trees begin to show clear signs of renewed growth. Observing the emergence of new buds, the appearance of fresh leaves, and any early color changes can reveal much about a tree’s health. It's essential to look close, gently examining branches for winter storm damage or frost cracks, both of which can threaten the integrity of even the strongest tree. An early spring inspection offers owners the chance to spot minor issues before they develop into more significant problems. What You'll Learn in This Spring Tree Care Checklist for Homeowners How to conduct a seasonal inspection Steps for pruning, fertilizing, and mulching The role of certified arborists Spring-specific tree threats and prevention This guide will walk you through all the crucial steps, from inspection and maintenance to pest control and seeking professional tree care service when needed. Whether you're new to landscaping or looking for advanced tips, these practical pointers keep your trees healthy and your property safe. Understanding the Spring Tree Care Checklist: Importance and Overview Benefits of Following a Tree Care Checklist Regularly Utilizing a spring tree care checklist for homeowners ensures every essential task is addressed at the right time. Consistent application of these steps supports vigorous spring growth, increases disease resistance, and minimizes the potential for costly storm damage. It also leads to healthier trees that offer greater shade, improved air quality, and even increased property value over time. The checklist approach is not just about avoiding problems; it's an opportunity to provide your trees exactly what they need when they need it most. Especially for property owners with mixed landscapes or various species, a detailed care checklist helps ensure no tree is overlooked, regardless of age or type. Common Spring Tree Issues for Homeowners Some of the most frequent issues arising in spring include dead branches from winter, pest infestations like aphids or borers, and fungal problems caused by excess moisture. Homeowners should also be on the lookout for signs of stress or disease, including abnormal leaf color, wilting, or excessive sap flow. Keeping a checklist handy makes it easier to remember evaluation points and to spot potential hazards early—saving both time and hassle. "A systematic tree care checklist ensures longevity and safety for landscapes of all sizes." – Certified Arborist Step 1: Early Spring Inspection and Hazard Identification for Trees Identifying Signs of Winter Damage After a tough winter, it’s critical for property owners to look for visible damage caused by snow, ice, and fluctuating temperatures. Common warning signs include splitting bark, dead or cracked branches, and other injuries sustained from winter storm events. These problems can allow pests and diseases to infiltrate, compromising the tree’s structural integrity. The earlier these issues are addressed, the safer your landscape will be as the season advances. Each tree should be checked for wounds, especially on the trunk and main limbs. If there are major cracks or large areas of missing bark, the tree may need immediate professional assessment. In many cases, smaller branches can be pruned, but significant problems often require the expertise of a certified arborist or a professional tree care service. Spotting Pests and Fungi During Spring Growth Cracked branches Oozing sap Sawdust accumulations near roots Spring is a great time to be on heightened alert for pest and fungal activity as trees begin to recover from dormancy. Pests, such as boring insects, may leave behind sawdust near the tree’s base, while sap oozing from the bark often means the tree is fending off infection or physical stress. Certain fungi can appear as soft, discolored patches or spots on bark or leaves, and their early detection is crucial to preventing wider infestations. Observing for powdery mildew, leaf spots, or unusual textures on the trunk helps catch emergencies before they escalate. As you refine your spring tree care routine, it's also worth considering how advancements in smart irrigation can support healthier trees and more efficient water use. For example, new technologies are making it easier for homeowners to optimize watering schedules and conserve resources—learn more about these innovations and their impact on modern landscapes in our feature on how Irrigreen's $19M funding is transforming smart irrigation technology. Step 2: Pruning Trees with Spring Tree Care Checklist Guidelines When and Why to Prune in Spring Early spring—just before trees begin to leaf out—is an ideal time for pruning. Removing dead branches, addressing winter damage, or thinning excess growth allows healthy buds to flourish. Proper pruning at this stage encourages vigorous spring growth, better air circulation, and helps prevent disease by reducing overcrowding. Waiting too late may stress the tree as it expends energy, so timing is everything. Strategic pruning also improves safety, decreasing the risk of falling limbs during seasonal storms. For property owners managing diverse types of trees, understanding each species' needs will ensure optimal health and long-term resilience. Proper Techniques for Pruning Healthy Spring Growth Pruning should always be conducted with sharp, sanitized tools to minimize harm. Cuts should be made just outside the branch collar without leaving stubs or damaging the main trunk. For most spring tree care checklist for homeowners routines, it’s best to avoid topping trees or removing more than 25% of live branches in a single season, as over-pruning can stress the tree and invite pests. Be attentive to crossing or rubbing branches, weak crotches, and limbs that overhang structures or pathways. If large limbs need removal or the tree is especially tall, contacting a professional tree care service or certified arborist is always recommended for safety and proper results. Step 3: Fertilization and Soil Care on Your Tree Care Checklist Testing Soil for Nutrient Deficiencies Soil health defines how well your trees grow during the season. Early spring is the perfect time for testing soil to check for deficiencies in essential nutrients such as nitrogen, phosphorus, and potassium. Several over-the-counter kits make soil testing easy for homeowners, offering actionable insights that shape your fertilization routine. The results help create a bespoke fertilization plan that addresses only what your trees truly need—preventing over-fertilization, runoff, or wasted effort. Balanced, nutrient-rich soil is the basis of any effective spring tree care checklist. Applying Fertilizer: Dos and Don’ts for Spring Tree Care Fertilizing should be reserved for when a tree genuinely needs extra nutrients. The dos include using slow-release products, applying fertilizer around the drip line rather than the trunk, and watering thoroughly after application. The don’ts include fertilizing stressed or newly planted trees unless recommended by a certified arborist, as this can inhibit proper establishment. Always read and follow label instructions, consider tree species, and use fertilizers specifically formulated for trees. Avoid using high-nitrogen lawn fertilizers around tree roots, as these may burn sensitive roots or encourage excessive, weak growth. Fertilizer Types vs. Tree Variety and Soil Needs Fertilizer Type Best For Tree Variety Soil Condition Slow-Release Granular Most mature shade and fruit trees Balanced or slightly depleted Organic Compost Young, newly planted, and sensitive trees Poor or sandy soils Liquid Seaweed Ornamentals during peak growth Nutrient-deficient, fast-draining soils Step 4: Mulching for Maximum Spring Tree Health Choosing the Right Mulch for Your Spring Tree Mulch isn't just decorative—it’s a powerful tool for moderating soil temperature, retaining moisture, suppressing weeds, and replenishing organic matter. For the spring season, choose a natural mulch, such as shredded hardwood, pine bark, or compost, applied in a 2-4 inch layer around the root zone, but not directly against the trunk. The right mulch for your tree will depend on species, age, and local climate, but organic mulches are generally safest and most effective. For both new and established trees, mulching in spring protects roots from erratic temperatures and reduces the need for frequent watering or weeding, making tree care easier for busy homeowners. How Mulching Supports the Tree Care Checklist A well-mulched tree has a major advantage during unpredictable spring weather. Mulch buffers the impact of heavy rain, prevents soil compaction, and fosters the presence of helpful microbes—all vital elements of a healthy growing season. Including mulching in your tree care checklist not only saves time and money but promotes long-term tree vitality and stronger resistance to disease and pests. Step 5: Watering Wisely – Key to Every Spring Tree Care Checklist Signs Your Trees Need Water in Spring While spring often brings regular rainfall, trees can still experience drought-like symptoms if soil drains too quickly or rain is sparse. Wilting, curled leaves, or unusually small growth are signs that a tree needs supplemental watering. Pay special attention to newly planted or young trees, which are especially vulnerable to moisture stress during spring growth. Checking soil moisture by inserting a garden trowel or screwdriver a few inches into the ground near the root zone can help you assess if deeper watering is required. This step is an essential safeguard against both under- and overwatering—a common mistake for homeowners. Best Watering Practices for Root Development Proper watering means deep, infrequent soaks that reach the entire root system, rather than light daily sprinkles that leave roots near the surface. The best approach is to water early in the day to reduce evaporation, always at the drip line, and to mulch afterwards to maintain moisture. For established trees, aim for soil moisture levels that feel consistently damp but not soggy. Watering too much can cause root rot, while too little stunts growth. Your spring tree care checklist should remind you to adapt watering based on weather patterns and tree age, ensuring continual, steady spring development. Step 6: Pest and Disease Prevention for Spring Trees Common Spring Pests and Diseases to Watch For With warmer days, pests like aphids, borers, and scale insects emerge, joined by fungi such as powdery mildew, anthracnose, or canker diseases. Visible symptoms include holes in leaves, sticky honeydew, distorted new growth, or odd discolorations. These dangers are especially pronounced in certain species and younger or stressed trees, which are more vulnerable in early spring. Regular inspection is the key to catching these threats early. Stay ahead of infestations and infections by reviewing the state of foliage, bark, and soil as part of your checklist. Integrating Pest Prevention into Your Tree Care Checklist Non-chemical solutions—like encouraging beneficial insects (e. g. , ladybugs and lacewings), keeping trees pruned for air circulation, and removing diseased plant matter—are the first line of defense. Integrated pest management involves a combination of good hygiene, physical barriers, and careful selection of any needed treatments. This approach keeps your trees—and the environment—safe and healthy during spring growth. Step 7: Consulting a Certified Arborist: When Professional Tree Care is Needed What Certified Arborists Can Offer Homeowners Certified arborists bring specialized expertise to diagnose, treat, and prevent complex tree health issues. They’re equipped to manage hazardous limbs, persistent diseases, or deep-rooted soil issues, and offer advice tailored to your region and property type. Regular evaluations by a certified arborist can catch small issues before they escalate into expensive emergencies, and ensure proper pruning and fertilization techniques are followed for every tree species on your property. Arborists also help with risk assessments for older or high-value trees and offer guidance on long-term landscaping and tree care strategies suited for both residential and commercial properties. How to Find Quality Tree Care Service in Spring When searching for a tree care service, always verify certifications, insurance, and references. Look for ISA Certified Arborists or accredited companies through trusted industry organizations. Reading local reviews and seeking recommendations from neighbors or your cooperative extension office increases your odds of finding a reputable provider. Don’t hesitate to ask about ongoing maintenance options, support numbers, and detailed plans before signing agreements to ensure the best value for your spring tree care needs. Sustainable Practices for Homeowners: Eco-Friendly Spring Tree Care Composting and Natural Mulch Eco-friendly tree care checklist routines embrace organic solutions, such as composting yard and kitchen waste to create natural mulch. Compost not only adds nutrients back into the soil but also improves its structure and water retention over time. Using grass clippings, shredded leaves, or bark chips as mulch recycles on-site resources and supports a healthy backyard ecosystem. It’s easy, affordable, and reduces landfill waste—all while feeding your trees what they need. Water Conservation Tips for Healthier Trees Efficient watering is a core principle of both sustainability and tree health. Use drip irrigation, water bags for young trees, and time your waterings for early morning or evening. Allow mulch to do its part in moisture retention, reducing your reliance on irrigation. Monitoring local rainfall will help avoid overwatering, saving water and protecting your landscape’s future. "Eco-friendly practices benefit both your trees and the broader ecosystem." Spring Tree Service: DIY or Hire? Assessing Your Comfort and Capability for Spring Tree Care DIY: Light pruning, basic mulching Professional: Hazard removal, disease treatment Deciding between a DIY approach and hiring a tree care service depends on your comfort and capability. Most homeowners can handle basic tasks like mulching, minor pruning, watering, and inspecting for pests. However, large tree removals, major pruning, or addressing persistent diseases are best left to certified arborists. Attempting these tasks without proper training may result in injury or long-term tree damage. Knowing your limits—and your local support number for emergencies—ensures safety and the best outcome for your landscape. Tree Care Checklist for Special Tree Types in Spring Spring Care for Ornamentals vs. Fruit-Bearing Trees Ornamentals such as dogwoods or maples may require lighter pruning and less fertilizer, focusing primarily on shape and flower development. Fruit-bearing trees, in contrast, often benefit from more aggressive spring pruning to remove weak growth and encourage fruit production. Watch for specific pests—like apple maggot flies or peach leaf curl—that frequently target fruit trees early in the season. Always apply mulch and fertilizer tailored to the particular requirements of your ornamental or fruit trees for robust spring health. Young, Newly Planted Trees: Spring-Specific Advice Early flowering trees Fast-growing shade trees Sensitive/small-rooted species Young or just-planted trees are especially sensitive during their establishment period in spring. Water consistently, but avoid overwatering; use organic mulch to regulate soil temperature; and avoid fertilizing unless a soil test confirms deficiencies. Early flowering and shade trees require monitoring for frost damage, and small-rooted species benefit greatly from extra protection against wind and mechanical injury. The goal: nurture steady growth without stressing the young root system. Seasonal Spring Growth Concerns: Addressing Unusual Issues Sudden Wilting or Leaf Drop Unexpected wilting or leaf loss during spring often signals water, root, or disease issues requiring prompt attention. Examine soil moisture first: both drought and overwatering can look similar on the surface. If watering appears adequate, inspect for pests, decay, or root disturbance—especially if the tree was recently transplanted. Early intervention prevents irreversible stress and ensures your spring tree care checklist remains a tool for growth, not damage control. Recognizing Abiotic vs. Biotic Stressors in Spring Abiotic problems are those stemming from environmental factors, such as nutrient deficiencies, mechanical injury, or weather extremes, while biotic stressors are caused by living organisms like fungi, insects, or bacteria. Being able to distinguish between these helps target your response—fertilize or add mulch for abiotic complaints, and prune or treat for biotic attacks. Your tree care checklist should include notes on patterns and origins of symptoms to help diagnose and act quickly each spring. See visual guides and expert advice in our companion video on spotting early signs of disease in leaves, bark, and branches during peak spring growth. People Also Ask: Essential Questions on Spring Tree Care Checklist for Homeowners What are the first steps I should take with my trees when spring starts? Answer: Begin your spring tree care checklist by inspecting for any winter damage, such as cracked or broken branches. Assess overall tree health, look for new bud formation, check soil moisture, and clean up debris around the base. Early intervention sets the stage for a successful growing season. When is it too late to prune trees in the spring? Answer: While early spring is the preferred time for most tree pruning, you should stop heavy pruning once trees are fully leafed out. Pruning too late may stress the tree, hamper growth, and invite pests. For best results, stick to minor shaping or remove dead wood if you’re unsure. How do I know if my tree needs professional care? Answer: If you notice large cracks, significant leaning, excessive deadwood, visible fungus, or persistent pest problems, it’s time to consult a certified arborist. Complex issues or trees near structures should always be addressed by professionals for safety and effective treatment. Frequently Asked Questions: Spring Tree Care Checklist for Homeowners How often should I inspect my trees in spring? Inspect your trees every two to four weeks throughout the spring season, especially after storms or large temperature swings. Frequent checks help you catch small issues before they become major problems and support healthier spring tree growth for homeowners. What is the best time to fertilize trees according to a spring tree care checklist? The ideal time to fertilize is just before bud break in early spring. This timing supplies roots with nutrients before rapid growth begins, but avoid fertilizing newly planted or stressed trees unless a soil test indicates otherwise. Do all trees require mulching as part of the care checklist? Most trees—especially young, ornamental, and fruit-bearing ones—benefit from mulching in spring. However, avoid smothering the trunk or building mulch "volcanoes. " Use only organic, weed-free products recommended by your tree care checklist for the best results. What signs of tree disease should homeowners look for in spring? Key signs include wilting, leaf spots or blotches, oozing sap, abnormal growths on bark, and early leaf drop. Fungal bodies or visible pests also indicate problems. Check your spring tree care checklist for a full list of symptoms and contact a certified arborist for ambiguous issues. Summary Table: Spring Tree Care Checklist for Homeowners - Action Steps Spring Tree Care Checklist for Homeowners: Action Steps Checklist Step Action Recommended By Spring Timing Inspection Assess for winter damage, pests, general health Certified Arborist Early spring, every 2-4 weeks Pruning Remove dead, damaged, diseased branches Tree care service, arborist Before bud break or early in leaf-out Fertilizing Apply if needed after soil testing Certified Arborist Just before growing season Mulching Apply 2-4” natural mulch around drip line Tree care checklist Late winter to early spring Watering Deep water as needed, monitor soil Tree care checklist Throughout spring Pest/Disease Monitor, remove infestations early Certified Arborist Ongoing in spring Professional Help Hire for hazards, disease, major pruning Certified Arborist As needed Key Takeaways for Spring Tree Care Checklist for Homeowners Consistent seasonal care ensures tree health Prevention and early intervention reduce costs Professional help is essential for complex issues Final Thoughts: Your Commitment to Spring Tree Care "Investing time in a spring tree care checklist today yields healthy and beautiful trees all year long." If you’re inspired to take your landscape management to the next level, exploring the latest in smart irrigation technology can be a game-changer for both tree health and water conservation. Discover how industry innovations are shaping the future of lawn and tree care by reading our in-depth analysis of Irrigreen’s $19M investment and its impact on smart irrigation solutions. By integrating these advanced tools with your spring tree care checklist, you’ll be well-equipped to nurture a thriving, sustainable landscape season after season. For more timely information subscribe to Tree Guardian News Sources Arbor Day Foundation: Tree Care Tips International Society of Arboriculture: Homeowner Information Penn State Extension: Spring Tree Care The Morton Arboretum: Tree Plant Care Tips

Terms of Service

Privacy Policy

Core Modal Title

Sorry, no results found

You Might Find These Articles Interesting

T
Please Check Your Email
We Will Be Following Up Shortly
*
*
*