Add Row
Add Element
Tree Guardian News
update
Tree Guardian News
update
Add Element
  • Home
  • Categories
    • Storm Shield
    • Roots & Routes
    • Disease Detective
    • Insurance Intel
    • DIY Arborist
    • Futureproof Foliage
    • Pro-Partner Spotlight
    • Arborist Stories
    • Tree Care Blog
    • Tree Guardian News Blog
SUBSCRIBE TO NEWSLETTER 
  • update
  • update
  • update
  • update
  • update
  • update
  • update
June 30.2025
1 Minute Read

Summer Tree Care Tips to Save Your Trees Now

"Studies show that over 30% of urban trees experience stress-related decline during summer months—proper summer tree care is vital for lasting tree health."

What You’ll Learn: In this guide, you’ll unlock the secrets to effective summer tree care , from spotting early signs of stress to watering and mulching like a pro. Whether you’re a weekend gardener or a seasoned plant lover, master the best tree care tips for a lush and resilient landscape all season long.

Mastering Summer Tree Care: Your Guide to Trees’ Health and Resilience

  • Explore practical summer tree care tips that shield trees from heat stress and environmental challenges
  • Learn proven strategies for maintaining trees healthy despite seasonal adversity

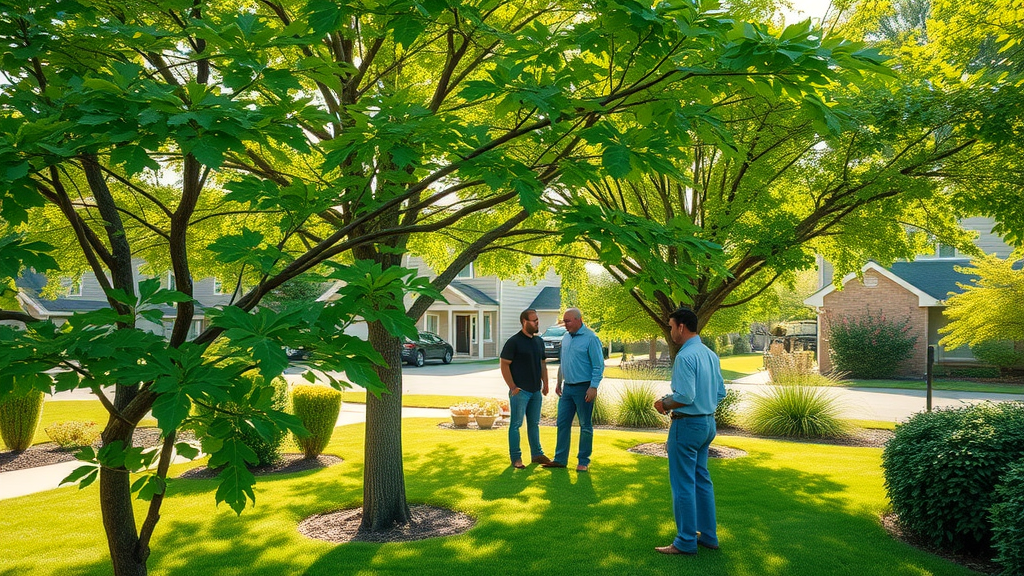
Summer tree care is about more than just watering when things get hot—it’s a comprehensive approach to ensure your trees survive and thrive even in stressful conditions. The summer months can be challenging for even the healthiest trees, with heat, dry spells, and pests threatening their vitality. Taking action now with the right tree care tips will help avoid costly damage and keep your yard looking vibrant.

From preventing heat stress to nurturing tree roots , summer is the perfect time to shape your yard’s future. Through this article, you’ll absorb the essentials of soil test , effective watering, mulching, and how to combat pests and diseases—expert knowledge you can use for a robust yard year after year.

lush residential yard with healthy, vibrant green trees, people calmly checking trees for signs of stress, Photorealistic High Fidelity Lifelike, suburban background with well-kept lawn and gardens, highly detailed, leaves gently rustling in a summer breeze, sharp focus, vivid colors, natural afternoon sunlight, shot with a 35mm lens.

How Summer Tree Care Impacts Long-Term Trees’ Health

Understanding Trees in the Summer: Unique Challenges and Opportunities

The summer months test even the toughest trees. Prolonged heat, sudden thunderstorms, and unpredictable droughts can cause dead branches and increased vulnerability to pests. However, summer is also a period of explosive root growth and foliage development. By recognizing seasonal challenges, you can adapt tree care methods for maximum resilience. Trees in the summer benefit from extra water retention, protection against sun damage, and proactive health checks.

The possibility of storm damage is higher during hot weather, especially after a dry spell. A strong, well-tended tree rebounds faster from high winds and other incidents. Smart tree care tips during summer not only keep your trees healthy now—they lay the foundation for decades-long health, reducing maintenance costs and boosting your property’s appeal.

The Science Behind Trees’ Health During Hot Weather

Trees are sophisticated organisms reacting to every environmental signal. When exposed to high temperatures, their tissues lose water more quickly, leading to symptoms such as wilting leaves , brown edges , and premature leaf drop . This makes proper summer tree care vital. Techniques like mulching, deep watering, and soil testing help trees optimize water use, minimize heat absorption, and acquire key nutrients necessary for robust growth.

It’s important to realize that tree stress in summer can remain hidden until it becomes severe. By the time you notice colored leaves or thinning canopies, there may already be underlying root damage or depletion of essential nutrients. Regular care, including checking the base of the tree for changes in bark texture and soil, will catch issues before they threaten trees health .

Common Signs of Tree Stress in Summer Possible Cause Recommended Summer Tree Care Tip
Wilting Leaves Heat Stress/Lack of Water Increase Mulching & Deep Watering
Brown Edges Overexposure to Sun Provide Shade, Adjust Watering
Leaf Drop Soil Compaction Soil Aeration and Organic Mulch

Essential Summer Tree Care Tips for Every Homeowner

Inspect Your Trees Regularly for Early Signs of Stress

Early detection is one of the most valuable tree care tips you can implement. By routinely inspecting your trees, you can spot signs of heat stress , pests and diseases , and nutrient deficiencies before they escalate. Look for issues such as wilting leaves , unexpected leaf drop , changes in bark texture, and presence of insects. Focus especially on newly planted or young trees, as these are more vulnerable to summer extremes.

Walk around your yard at least once a week to inspect your trees . Pay attention to the base of the tree for soft spots or fungal growth, and assess canopy density for thinning areas that could indicate internal issues. Keeping a photo log can help you track subtle changes in foliage color or growth patterns. These simple steps will ensure your trees healthy throughout the summer months.

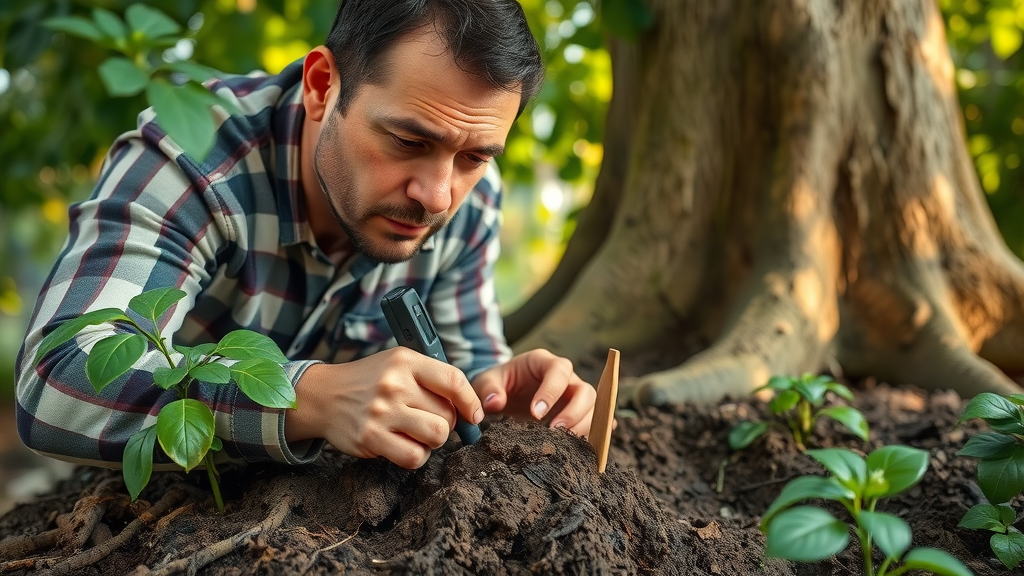
Soil Test: Foundation of Effective Summer Tree Care

Healthy trees start with healthy soil. Conducting a thorough soil test reveals vital information: pH levels, nutrient availability, and possible compaction. These tests guide your fertilization and watering schedule, addressing deficiencies before symptoms appear. A soil test can also pinpoint areas with poor drainage or excessive clay, which can exacerbate issues during the hot season.

Most local extension offices offer affordable soil test kits, or you can hire a certified arborist for in-depth analysis. After testing, amend your soil by adding compost, organic mulch, or specific nutrients as needed. This will support healthy root growth and better drought resistance, forming the backbone of strong summer tree care.

gardener using soil testing kit around tree roots, focused and attentive expression, gently probing ground, Photorealistic High Fidelity Lifelike, leafy garden background with visible tree trunk and soil layers, highly detailed, subtle movement of leaves, earth tones, morning sunlight, shot with a macro lens.

Proper Watering Techniques to Keep Trees Healthy All Summer

One of the most important aspects of summer tree care is watering correctly. The best time to water is early morning when evaporation is low, allowing water to reach deeper tree roots efficiently. Deep and slow irrigation methods, such as using a soaker hose , prevent surface runoff and encourage roots to grow downward, making them more resilient to drought.

  • Best watering times: Early morning (before 9 am) or late evening—avoid midday heat to retain moisture and reduce evaporation risks.
  • Deep & slow irrigation: Set a soaker hose at the base of the tree or use a drip system to ensure water penetrates at least 8-12 inches into the soil.
  • Drought considerations: In times of drought, add mulch and reduce mowing around trees to prevent water loss both at the soil surface and the base of the tree .

Remember, frequent shallow watering can do more harm than good, promoting shallow root systems that are prone to heat stress . For newly planted trees, increase watering during the first two seasons, as their roots are less established.

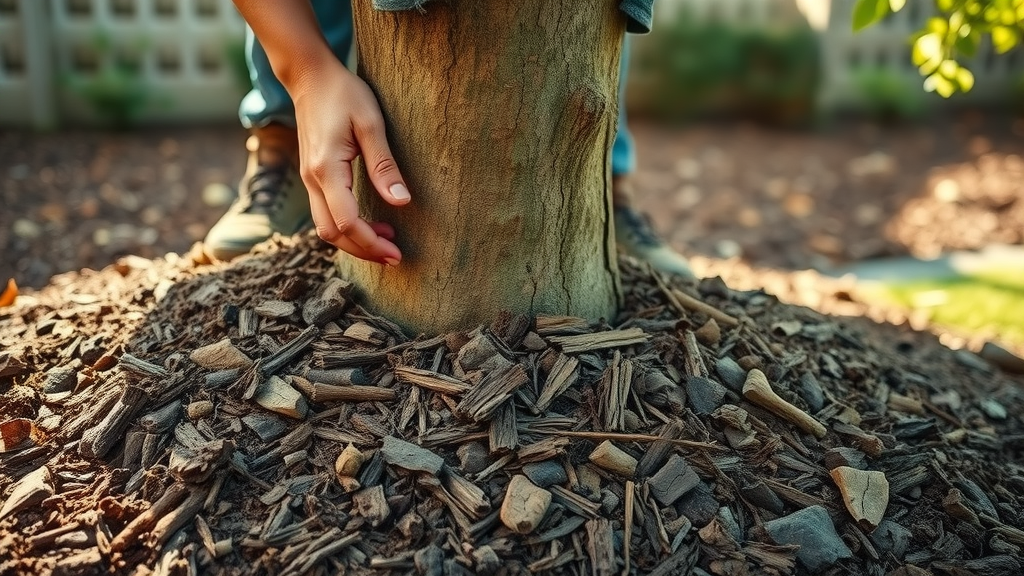
Mulch for Maximum Moisture Retention and Root Protection

Mulching is an essential step in summer tree care—it shields roots from heat, helps retain moisture , and prevents weed competition. Apply 2-4 inches of organic mulch, such as shredded bark or wood chips, around the base of the tree , but keep mulch a few inches from the trunk to avoid rot.

Not only does mulch insulate tree roots from temperature extremes, but as it breaks down, it adds organic matter to the soil, supporting healthy root growth . Refresh mulch annually and monitor for signs of mold or fungus, which indicate excessive buildup or insufficient airflow.

close-up of rich organic mulch being spread around the base of a tree, nurturing and careful action, Photorealistic High Fidelity Lifelike, natural setting in a backyard, highly detailed, mulch particles, earthy textures, balanced natural outdoor lighting, subtle contrasts, shot with a 50mm prime lens.

Fertilization Facts: Supporting Trees’ Health Through Summer

Fertilization keeps trees healthy by supplying essential nutrients that may be lacking after heavy spring flushes or exposure to high summer sun. For maximum benefit, fertilize after a thorough soil test and only use slow-release or organic options to avoid burning tree roots or promoting weak, fast growth susceptible to storm damage.

For mature trees, avoid late-season fertilization which can stimulate tender new growth unable to withstand the upcoming cooler months. When in doubt, consult a certified arborist to ensure your fertilization plan aligns with overall summer tree care strategies.

Tree Care Tips to Combat Heat Stress

Identifying and Preventing Heat Stress in Summer Tree Care

Recognizing the early warning signs of heat stress —such as limp or curling leaves, browning edges, and leaf scorch—empowers you to act quickly before significant damage occurs. The best tree care tips for prevention include mulching, deep watering, and creating shade through groundcovers or artificial barriers.

Monitor your trees daily during heatwaves, paying particular attention to young or newly transplanted specimens. Implement additional watering or install temporary shade during multi-day hot spells. Remember, “Even a single extreme heatwave can set tree growth back for years without proper care tips applied.”

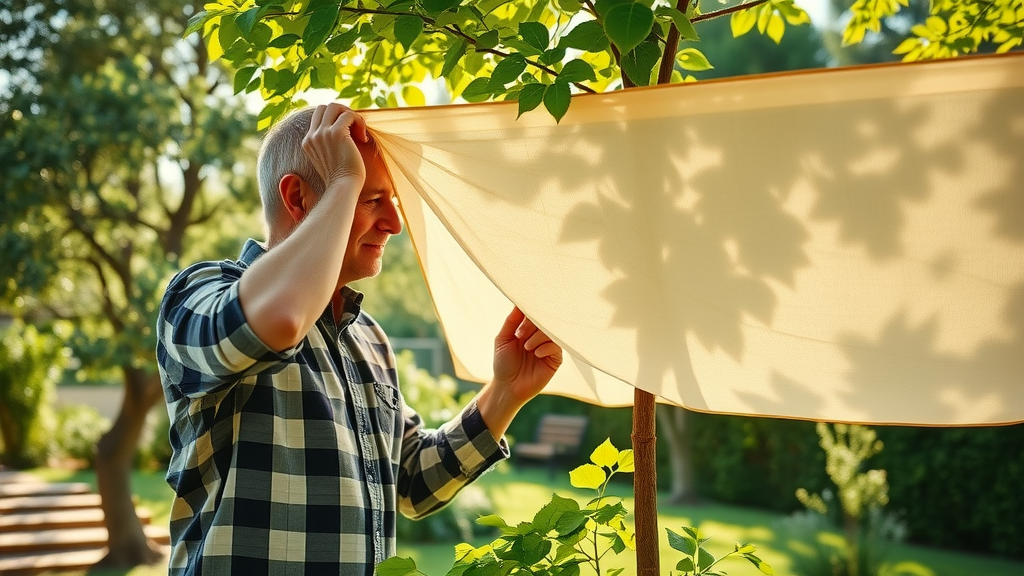
Creating Shade: Physical Barriers and Strategic Planting

If you notice persistent heat stress , consider adding physical barriers such as shade cloths or temporary fencing, especially for saplings and heat-sensitive species. Strategic planting—such as utilizing taller shrubs, hedges, or positioning trees near structures—also provides year-round relief from harsh sun.

These methods not only help preserve the current season’s growth but also protect from sudden temperature spikes. By designing your landscape with shade in mind, you’ll naturally reduce water use and create a more comfortable, sustainable backyard ecosystem.

homeowner setting up a shade cloth barrier over a young tree, thoughtful and careful, gently adjusting the fabric, Photorealistic High Fidelity Lifelike, background of sunlit yard with other shaded and unshaded trees, highly detailed, shade cloth fluttering in a light breeze, vivid summer colors, dappled sunlight, shot with a 24mm lens.

Defending Trees in the Summer: Pests, Diseases, and Threats

Monitoring for Pests and Diseases Throughout the Season

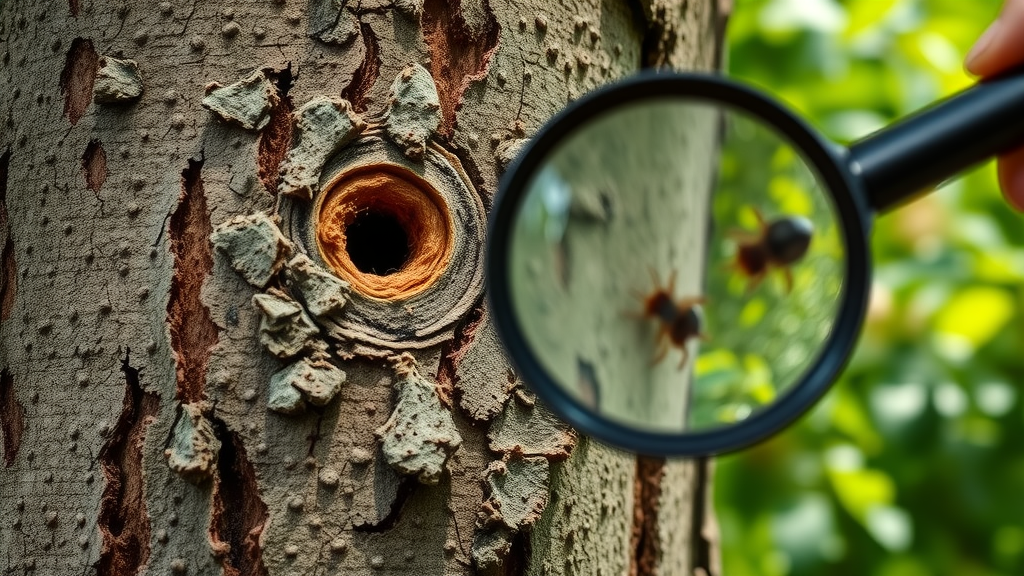
Summer is prime time for pests and diseases . Beetles, borers, aphids, and fungal pathogens can quickly damage trees health if unchecked. By establishing a regular inspection routine—examining trunks, leaves, and the base of the tree for holes, sap, or odd growths—you’ll spot trouble early.

  • Aphids: Sticky residue and distorted new growth
  • Borers and beetles: Tiny exit holes or sawdust at base
  • Leaf spots and blights: Brown or black spots, yellowing leaves
  • Caterpillars: Webbing or chew marks on foliage

If you find evidence of pests or disease, promptly consult a certified arborist for targeted remedies that won’t harm beneficial pollinators or natural predators crucial for your yard’s sustainability.

detailed macro shot of tree bark showing signs of pest infestation (tiny holes, frass), observer using magnifying glass, scrutinizing and analytical, Photorealistic High Fidelity Lifelike, tree trunk in a leafy garden setting, highly detailed with sharp textures, realistic bug movement, earth and green color palette, bright indirect sunlight, shot with a macro lens.

Tree Pruning and Maintenance: Tree Care Tips for Summer Growth

When and How to Prune Trees in the Summer for Maximum Health

Summer pruning requires a delicate touch. The perfect time to prune is right after spring’s growth and before peak summer heat sets in, ideally when trees are less stressed. Focus on removing dead branches , crossing limbs, or any growth that obstructs sunlight or airflow through the canopy.

Always use sanitized, sharp tools to limit the chance of spreading diseases. When in doubt, consult a certified arborist —improper pruning can do more harm than good, stalling root growth and allowing pests to invade fresh wounds.

Common Mistakes Homeowners Make During Summer Tree Care

The eagerness to improve your yard can sometimes backfire. Overwatering, excessive fertilization, and “topping” (improper cutting of large branches) are frequent missteps that cause long-term harm. Applying mulch too close to the trunk restricts airflow and promotes rot, while failure to regularly inspect your trees means hidden issues can worsen.

Another pitfall is ignoring the need for professional help for large or dangerous trees—DIY efforts near power lines or for major structural pruning put you and your trees at risk. Instead, lean on the expertise of a trusted professional tree service or certified arborists .

Summer Tree Care Tips for Young, Mature, and Special Trees

Tailoring Care Tips for Newly Planted Trees

Newly planted trees require vigilant summer care. Water them two to three times weekly, ensuring the soil is consistently moist but not waterlogged. Apply mulch generously, but never pile it directly against the trunk. Shield saplings from the harshest midday sun by using stakes with shade cloth or leveraging existing foliage for temporary cover.

Regular soil test and adjusting for deficiencies support healthy root growth and speedy establishment. Remove any tags or bindings from the trunk to prevent girdling and closely observe for any changes in leaf color or vigor.

Supporting Mature Trees Facing Seasonal Stress

Mature trees are usually more resilient but still vulnerable to cumulative effects of drought, pests, and soil compaction. Maintain a consistent deep watering routine, focus on mulching, and minimize construction or foot traffic around the base of the tree to encourage healthy roots. For larger trees, cabling or bracing may be necessary if you notice leaning or splitting limbs after storms.

Schedule an annual check with a certified arborist or professional tree service to diagnose and treat issues early. Proactive intervention ensures established specimens remain landscape focal points for years to come.

Caring for Flowering and Fruit Trees During Hot Months

Flowering and fruit trees are especially sensitive to summer tree care protocols. Consistent irrigation is crucial during flowering and fruit set. Mulch deeply to avoid soil drying and apply a light, slow-release fertilizer following soil test recommendations. Thin fruit if overabundance causes branch strain and remove diseased wood promptly to protect next year’s growth.

Monitor for pests like fruit flies and leaf spot fungi, employing natural deterrents or approved treatments. This attention to detail guarantees a quality harvest and vibrant blossoms season after season.

People Also Ask: Trees Health and Summer Tree Care

How can you care for your trees in June and July?

In June and July, prioritize watering trees early in the morning, mulch around the base to retain soil moisture, inspect for signs of pests and diseases, and perform a soil test to adjust fertilization. Prune only lightly to remove damaged branches and shield young trees from direct sun exposure.

Who is responsible for trees next to power lines?

Trees next to power lines are typically the responsibility of the utility company, but property owners should report hazards and never attempt pruning near lines themselves. Professional tree care services are essential for safety and compliance.

How often should you water a tree in summer?

Deeply water established trees once a week in summer, increasing frequency during droughts or heat waves. Newly planted trees may need water two to three times weekly. Soil type, tree species, and weather conditions affect exact schedules.

Why do tree leaves turn brown in summer?

Browning leaves in summer are often caused by inadequate watering, heat stress, root damage, or disease. Assess soil moisture, adjust watering, add mulch, and consult a tree care specialist if browning persists.

Frequently Asked Questions on Summer Tree Care Tips

  • What is the best mulch for summer tree care? Organic mulches like shredded bark, leaf mold, or wood chips are ideal, offering excellent moisture retention and temperature moderation.
  • How can I naturally discourage summer pests in my yard? Encourage beneficial insects, use neem oil or insecticidal soaps, and keep trees healthy to reduce pest issues.
  • When is fertilizing most effective in summer tree care? Fertilize only after a soil test, using slow-release formulas in early summer for best results. Avoid late-season fertilization.
  • Should I hire a professional for summer tree pruning? For large trees, pruning near power lines, or if unfamiliar with proper techniques, always rely on a certified arborist or professional tree service.

Level Up Your Landscaping with Professional Summer Tree Care

  • Apply these expert-backed summer tree care tips for a robust, beautiful yard all season long. For personalized guidance, call 203-271-7991 or visit TreeGuardianNews.com to subscribe.

Take action this summer—inspect, water, mulch, and safeguard your trees for health that lasts all year. Grow your landscaping expertise—call 203-271-7991 or visit TreeGuardianNews.com to subscribe.

To enhance your understanding of summer tree care, consider exploring the following resources:

  • Summer Tree Care Tips - Canopy

This article provides practical advice on replenishing mulch, pruning for strong growth, and inspecting tree health during the summer months.

  • Tree Care Tips for Summer | American Arborists

This resource offers insights into proper irrigation, trimming and pruning, mulching, fertilization, and pest inspections to keep your trees healthy throughout the summer.

If you’re serious about maintaining your trees’ health during the summer, these resources will provide you with valuable information and actionable tips.

Tree Care Blog

21 Views

0 Comments

Write A Comment

*
*
Related Posts All Posts
09.29.2025

Unlock the magic of stump grinding for a flawless yard

Have you ever wondered if you could reclaim your yard’s beauty without the heavy lifting of tree stump removal? When a tree is taken down, a stubborn stump can be left behind, ruining curb appeal, inviting pests, and putting a dent in your outdoor enjoyment. But what if you could whisk that eyesore away—quickly, cost-effectively, and without tearing up your yard? Stump grinding is the modern answer, and this guide will illuminate how it can transform patchy, cluttered landscapes into smooth, flawless yards you’ll love to show off. Dive in to discover whether stump grinding is your best way to unlock your property’s true potential. Can Stump Grinding Completely Transform Your Yard? The impact of stump grinding on your yard’s look and functionality is often underestimated. Tree stumps, whether from storm-damaged oaks or planned tree removal, are more than just unsightly—they’re obstacles to mowing, play, and landscaping. With a skilled grinding service, these reminders of past trees are ground down well below ground level, leaving you with a blank canvas for sod, garden beds, or simple grass regrowth. The result? A smooth, accessible, and visually appealing landscape where once there were hazardous, uneven patches. Unlike traditional stump removal, which usually involves digging out the entire stump and major roots, stump grinding uses powerful rotating cutting discs or blades to chip away wood until the trunk is reduced to mulch and fine chips. This approach is faster, less invasive, and doesn’t leave a giant hole to fill. Homeowners who invest in stump grinding often find the transformation is nearly immediate—in just a few hours, what was an eyesore becomes an asset, improving both property value and the use of outdoor space. Investigate the limitations and benefits of stump grinding versus stump removal "Stump grinding is the powerful, precise method that can renew lawn aesthetics instantly—no digging required." What You'll Learn About Stump Grinding The science behind stump grinding and stump removal When and why to choose a stump grinding service Steps to grind a stump safely and efficiently Environmental impacts and aftercare tips Understanding Stump Grinding: Techniques and Benefits What Is Stump Grinding and How Does a Stump Grinder Work? Detailed breakdown of stump grinders, grinder blades, and wood removal Stump grinding is an efficient, advanced method for removing tree stumps after a tree has been cut down. The process uses a specialized stump grinder—a power tool equipped with a robust, rotating cutting disc that chips away the stump and surrounding wood just below ground level. Unlike digging, which can disturb lots of soil and existing roots, grinding focuses on turning stumps into mulch without major upheaval. The grinder's blades or teeth move rapidly in a circular motion, effectively pulverizing the wood into small, manageable chips that can be repurposed as mulch or easily removed from the site. Most stump grinders, whether walk-behind or larger self-propelled units, are designed to tackle a range of stump sizes—from small stumps left after routine tree removal to large, mature tree stumps. The finer the chips, the more quickly the ground can be leveled and integrated back into your yard. This method is preferred by professional arborists not only for its speed and effectiveness but also for the minimal impact on your landscaping. The area can often be replanted, re-sodded, or landscaped the same week as the grinding, making the transition from eyesore to flawless yard nearly seamless. Stump Grinding vs. Stump Removal: Which Is Right for Your Tree Stump? Differences, pros/cons, and cost-efficiency Stump grinding and stump removal both aim to eliminate unwanted tree stumps, but they differ greatly in approach, cost, and how they affect your yard. Stump grinding is favored for its precision and minimal disruption: after the tree removal, a high-powered grinder chips the wood into mulch at or below the surface, typically 4–6 inches deep, leaving the main roots in place to decay naturally. With stump removal, the entire stump and as many roots as possible are excavated—this involves heavy machinery, significant disturbance to the surrounding soil, and usually results in a large hole that needs to be filled and leveled. The pros of grinding include speed, cleanliness, and the opportunity to quickly restore the site with sod or plantings; its main limitation is that large roots remain underground, slowly decomposing. In contrast, full removal is best if you plan to replant a major structure (such as a pool or new tree) at the exact spot, but comes with higher costs, more effort, and greater yard disruption. Homeowners generally opt for grinding because it’s cost-effective, fast, and ideal for restoring lawns or preventing hazards like tripping and pest infestation. Comparison of Cost, Time, and Longevity: Stump Grinding vs. Stump Removal Method Average Cost Time Required Impact on Yard Longevity Stump Grinding $100–$400 per stump 1–2 hours Minimal disturbance; ground level restored quickly Roots decay naturally; spot may settle over months Stump Removal $250–$600 per stump 2–5+ hours Significant soil disruption; large hole to fill No regrowth; instant, permanent removal Tools of the Trade: Selecting the Right Stump Grinder Types of Stump Grinders for Homeowners and Professionals Walk-behind stump grinders, self-propelled models, and heavy-duty options Choosing the correct stump grinder depends on stump size, quantity, and your comfort with machinery. Walk-behind stump grinders are ideal for small stumps or yards with tight access—these are lightweight, maneuverable, and available for rent at many hardware stores. Self-propelled and tow-behind models offer more power and are designed for medium to large stumps, making quick work of older, hard woods or multiple stumps in one session. Heavy-duty and track-mounted grinders are typically used by professionals for the biggest jobs—like clearing construction lots or old-growth tree stumps. Each type features a rotating cutting disc equipped with heavy-duty steel teeth or carbide tipped blades that chip wood with speed and precision. Besides capability, consider the pros and cons of renting versus hiring a stump grinding service. Homeowners may favor a walk-behind unit for one or two smaller stumps, but a professional’s heavy-duty grinder makes sense for safety, speed, and thoroughness—especially for large stumps, roots near structures, or hard-to-access locations. Do You Need a Stump Grinding Service or DIY Stump Grinding? Rental considerations, safety tips, and grinding service recommendations Renting a stump grinder can be economical for a confident DIY-er with one or two smaller stumps and good access. Rental rates typically run $75–$150 per day, but keep in mind the learning curve, physical effort, and risks involved—these are powerful tools that demand strict safety protocols. Always wear protective gear, review safety manuals, and mark the work area with cones or barriers. For larger, older tree stumps, stumps close to foundations, or jobs requiring multiple stumps removed in a day, a professional stump grinding service is a wise investment. Experts have high-powered equipment, proper insurance, and know how to avoid utility lines, nearby plantings, and structures. Many provide extra services like root chasing, chip cleanup, ground leveling, and even replanting recommendations. "Choosing the right stump grinder saves time, energy, and preserves your property’s look." Whether you go DIY or professional, the goal is the same: a yard free of trip hazards, pest magnets, and unwanted reminders of felled trees. Most homeowners appreciate the speed, convenience, and safety of hiring a trusted grinding service to get the job done right. While stump grinding is a highly effective solution, it's important to address stumps promptly to avoid hidden dangers like pest infestations and tripping hazards. For a deeper look at why timely action matters, explore the article on the risks of delaying stump grinding and how it can impact your yard’s safety. Step-by-Step Guide: How to Grind a Stump Safely Preparation: Site Evaluation and Equipment Safety Proper preparation is crucial before you grind a stump. Start with a thorough site evaluation, clearing debris, stones, and branches from around the stump. Mark the work area with safety cones and tape, especially if children or pets are nearby. Call 811 or your local utility locator to ensure no underground utilities cross beneath the stump—grinding can expose or damage buried lines. Gather necessary tools: gloves, rugged boots, goggles, hearing protection, and a dust mask. Stump grinders are loud, and safety is non-negotiable. Inspect the stump grinder for any damage or dull teeth on the cutting disc. Review manuals or online tutorials on machine operation. If renting, ask the attendant for a live demonstration. Clear at least 10-feet around the stump to provide movement space. If the stump is taller than 8 inches, use a chainsaw to trim it close to ground level. With the area clear and tools ready, you’ll minimize risks and create an efficient, smooth workflow for grinding the tree stump. The Grinding Process: Grinding the Tree Stump to Wood Chips With your site prepared and safety gear on, position the stump grinder so the cutting wheel hovers just above one edge of the stump. Engage the grinder’s controls, and slowly lower the rotating cutting disc into the wood, using steady, even pressure. Move the grinder side-to-side, allowing the disc to chip away at the stump, working from one edge to the other. After each pass, lower the cutting wheel another 2–3 inches until you reach the desired depth—usually 4–8 inches below the soil. The grinder’s teeth efficiently turn the wood into fine chips and mulch, which accumulate around the base. Be patient; harder woods or older stumps may require extra passes. For larger stumps or those with surface roots, reposition the grinder as necessary to reach all wood sections. Always keep bystanders at a safe distance and pause periodically to clear away excessive chips if visibility decreases. Once finished, your previously stubborn stump should now be a shallow depression filled with fresh mulch and wood shavings, ready for the final cleanup and restoration phase. Cleanup and Aftercare: What to Do Next After Stump Grinding How to fill and restore the ground after stump removal and stump grinding Post-grinding cleanup is the key to a polished finish. Begin by raking up excess mulch and wood chips—the nutrient-rich wood chips can be repurposed in garden beds or compost piles, or you may opt to have a grinding service haul them away. Next, backfill the remaining depression with topsoil, compacting lightly to prevent future settling. Scatter grass seed over the repaired area if you plan to restore lawn, or lay fresh sod for instant greenery. Water thoroughly to encourage fast root growth and monitor periodically as the ground may continue to settle as residual roots decompose. Proper aftercare prevents the site from becoming a low spot or inviting weeds. Regular maintenance—such as adding more soil if settling occurs or checking for insect activity—is essential for flawless long-term results. With care and patience, a site once marked by a rotting tree stump can soon be indistinguishable from the rest of your yard, primed for new landscaping, play, or whatever vision you hold for your revitalized space. Eco-Friendly Stump Grinding: Sustainability and Yard Health Is Leaving a Stump Bad for Your Yard? Leaving a stump after tree removal may seem harmless at first, but it can create real problems for your yard’s health and beauty. Tree stumps attract unwanted pests like carpenter ants and termites—these can quickly migrate to nearby trees, shrubs, or even your home. Stumps can harbor fungi and disease, which may spread to healthy vegetation. Unsightly and often hazardous, stumps become tripping risks, hampering lawn mowing and outdoor activities. Over time, an unremoved stump will decompose, but the process is slow and unpredictable. As the stump rots, it can leave uneven ground, promote weed growth, and, in wet environments, lead to dangerous fungus growth. Stump grinding offers a sustainable solution: by turning the trunk into mulch, you accelerate decomposition in a controlled way while reclaiming valuable yard space and preventing future problems linked to leaving a stump in place. Tree Removal and Stump Grinding: Environmental Considerations Best practices to minimize yard impact and encourage regrowth Environmentally responsible stump grinding starts with hiring reputable, insured professionals who know how to minimize impact on your soil, grass, and plantings. Modern grinders create much less disturbance than full excavation, preserving and even improving soil quality through the addition of wood chip mulch. Try to grind only as deep as necessary for your landscaping goals, and use wood chips to enrich shady garden beds or compost them for future use. Avoid grinding near delicate root systems when possible to prevent damage to nearby trees and shrubs. After the process, invest in healthy regrowth by adding quality topsoil and reseeding lawn areas. Choose eco-friendly ground covers or native plants to stabilize soil quickly. With careful planning and best practices, tree removal and stump grinding can both refresh and sustain your landscape, supporting healthy regrowth and reducing your yard’s environmental footprint. Costs and Considerations: Investing in Stump Grinding How Much Does It Usually Cost to Grind a Stump? The cost of stump grinding depends on several factors, including stump diameter, wood hardness, accessibility, and whether you hire a professional or take the DIY route. On average, you can expect professional services to charge $100–$400 per stump for small to mid-sized projects. Large stumps or those requiring extra effort (such as those surrounded by surface roots, rocks, or difficult terrain) may increase the price to $500 or more per stump. National averages put single-stump jobs at $250, with discounts per stump for bulk jobs. If opting for a rental, consider the cost of renting a grinder ($75–$150/day), the time and labor involved, and the potential for additional expenses if equipment damages your lawn or utilities. For complex or high-visibility areas, the expertise and efficiency of a professional arborist usually outweigh the extra cost. Always ask for a written quote and full scope of work before beginning a project. Factors Affecting Stump Grinding Pricing Size, location, type of stump, and additional removal needs Stump grinding services base their prices on the diameter and species of the stump (harder woods or larger diameters take longer and wear down blades faster), site accessibility (steep or fenced-in yards can require smaller, more portable grinders or extra labor), and the presence of surface roots or rocks. Tree stumps tangled with utilities or embedded deeply may mean additional charges for hand-digging or custom grinding work. Removal and disposal of mulch, application of topsoil, and site restoration are often extra services but may be included in a professional’s comprehensive quote. Multiple stumps or jobs combined with tree removal can often be discounted. Factor in all variables to choose a package that meets your budget and landscape needs. For homeowners considering future improvements, fully removing all roots and preparing for a permanent installation (like a driveway or pool) may justify the higher up-front cost of full stump removal. For most lawn, play, or garden areas, stump grinding makes the best use of your resources, keeping the process easy, safe, and affordable. Stump Grinding Service: When to Hire the Experts Comparing Grinding Service Options in Your Area With so many grinding service providers, how do you choose the right one? Look for experienced teams with strong reviews, proof of insurance, and modern stump grinders equipped for your stump size and yard conditions. Ask about their disposal policy for wood chips, restoration services, and schedule flexibility. Professional arborists should be willing to answer questions on safety, environmental best practices, and provide a detailed, itemized estimate before starting the job. Getting quotes from multiple companies ensures competitive pricing and helps you gauge the overall value—sometimes, more established companies offer bundled services like tree removal and stump grinding for significant discounts. Request evidence of past work and ensure the contract covers site preparation, grinding depth, cleanup, and post-job soil restoration. The right provider can often transform your yard in just one appointment, giving you instant results with none of the hassle or risk of a DIY attempt. Choosing Between Tree Removal and Stump Grinding Services Some homeowners will need to decide whether to bundle tree removal and stump grinding as a package or to handle each task separately. It’s often more cost effective and time-efficient to book both services with the same professional arborists. Your contractor can coordinate equipment, minimize site disruption, and tailor the grinding depth for everything from small to massive stumps. If you only need a single, existing stump removed, specialized stump grinding services are perfect for quick, hassle-free jobs. When choosing, consider your long-term landscaping plans. If you plan to renovate your yard, plant grass, or construct a patio where the tree stump was, stump grinding is ideal. However, if the project involves new construction or utilities, complete removal and additional excavation may be warranted. Consult a tree expert to assess your site and recommend the most efficient, cost-effective solution for your goals and budget. People Also Ask: Essential Questions About Stump Grinding How much does it usually cost to grind a stump? Overview: National average costs, pricing variables, and sample estimates for stump grinding service Most homeowners spend between $100 and $400 to grind a standard tree stump, according to national averages. Factors such as stump size, wood type, and site accessibility play a major role in determining cost. Difficult jobs—like those involving old, dense hardwoods or limited space—may be priced higher. If you have multiple stumps, many services offer a reduced per-stump rate, sometimes as low as $40–$50 for each additional stump after the first. Is it worth it to grind a stump? Weigh the aesthetic, safety, and long-term lawn health benefits of stump grinding over leaving a stump Yes, for most homeowners, stump grinding delivers excellent value. It rapidly improves curb appeal and removes serious tripping hazards. Additionally, grinding eliminates pest harborage (like carpenter ants and termites), halts disease spread to your yard, and allows immediate replanting or resodding. Compared to the slow, messy process of waiting for a stump to rot, grinding gives you control and a flawless finish in just hours. Can you grind a stump yourself? Safety considerations, required equipment, and expected outcomes when using a stump grinder to grind a stump yourself DIY stump grinding is possible with a rental grinder and proper safety precautions, especially for smaller stumps. You’ll need gloves, goggles, boots, hearing protection, and step-by-step equipment tutorials. However, the machines are powerful and potentially dangerous. For larger stumps, stumps near structures, or multiple removals, hiring a professional is the safest, fastest bet—and often yields the cleanest, most professional results. How to get rid of a stump in 2-3 days naturally? Alternative methods: organic rot, Epsom salt, and natural decay challenges Naturally getting rid of a stump in just a few days is almost impossible. Methods like drilling holes and applying Epsom salt or commercial stump removal products can speed up rot but typically take months to a year to show visible results. Burning is risky and may be prohibited locally. For rapid, guaranteed results, stump grinding or removal by professionals is the only real “instant” option. Chemical and rot methods can be used on small stumps in low-traffic areas with patience and proper safety precautions. FAQs on Stump Grinding, Tree Stump Removal, and Stump Grinders How deep should you grind a stump? Most professionals recommend grinding 4–8 inches below ground level to remove trip hazards and allow planting or sodding. Deeper grinds are possible for construction sites or major landscaping projects. What happens to roots after grinding? The main stump is pulverized, while most roots remain underground to decompose naturally. Over time, they decay and enrich the soil, but any major surface roots can also be ground as needed. Can a stump grinder remove surface roots? Yes, a stump grinder's rotating cutting disc can mulch exposed surface roots as well as the main stump. Inform your contractor if there are roots that create hazards or interfere with landscaping. Should you plant over a ground-out stump spot? Absolutely! With proper aftercare—topsoil, compost, and maybe some time as the roots decay—the site can support grass, flowers, or shrubs. Avoid planting large trees directly atop old roots to reduce future issues. Key Takeaways for Stump Grinding Success Why correct stump grinding is crucial for a flawless yard: It erases obstacles, removes hazards, and restores your lawn’s seamless appearance efficiently. How to assess if you need a professional grinding service: Consider stump size, location, your comfort with machinery, and the finished look you want to achieve. Common pitfalls and how to avoid them: Improper preparation or equipment use can cause injury or yard damage—always follow safety protocols and consult experts when in doubt. Conclusion: Transform Your Outdoor Space with Effective Stump Grinding With the right approach, stump grinding instantly revives your yard, turning an unsightly leftover into new possibilities for landscaping and play. "A flawless yard starts with attention to the details beneath your feet—including that old tree stump." If you’re inspired to elevate your entire landscape beyond just stump removal, there’s a wealth of expert advice available to help you achieve a truly remarkable outdoor space. Discover practical strategies and creative ideas in this comprehensive guide to transforming your yard with professional tree service tips. Whether you’re planning a full garden makeover or simply want to maintain a healthy, beautiful property, these insights will empower you to make the most of every square foot. Take the next step in your landscaping journey and unlock the full potential of your outdoor environment. Grow your landscaping expertise—call 203-271-7991 or visit TreeGuardianNews.com to subscribe. Video of professional stump grinding — focused on a team operating a stump grinder in a suburban backyard, including action of grinding, wood chip ejection, and post-grind site review; visually informative with clear demonstrations of safety procedures and step progression. Stump grinding is an efficient and environmentally friendly method for removing tree stumps, offering several advantages over complete stump removal. By grinding the stump down to several inches below ground level, this technique avoids the extensive excavation required in full stump removal, thereby preserving the surrounding landscape and minimizing soil disturbance. (arboroperations.com.au) One of the primary benefits of stump grinding is its cost-effectiveness. The process is generally quicker and less labor-intensive, making it a more affordable option for homeowners. (fixr.com) Additionally, the wood chips produced during grinding can be repurposed as mulch, providing a natural and beneficial use for the remnants. (ltrc-tree.com) However, it’s important to note that while stump grinding removes the visible portion of the stump, the underlying root system remains. Over time, these roots will decay naturally, which may limit immediate replanting options in the same spot. For projects requiring complete removal of the root system, such as construction or replanting in the exact location, full stump removal might be more appropriate. (angi.com) In summary, stump grinding offers a swift, less invasive, and cost-effective solution for enhancing your yard’s aesthetics and usability. By understanding the process and its benefits, you can make an informed decision that aligns with your landscaping goals.

09.28.2025

What most don’t know about tree cutting—avoid costly errors

Did you know improper tree cutting causes over $1 billion in property damages every year?That’s a figure most homeowners never expect—until it happens to them. Tree cutting isn’t just about chopping wood; it’s riddled with risks, hidden costs, and legal requirements that can turn a simple job into a costly ordeal. This guide reveals the biggest pitfalls in tree cutting and how you can sidestep them—saving your home, wallet, and peace of mind. The Hidden Realities of Tree Cutting: Insights Backed by Surprising Data "Recent studies show that improper tree cutting causes over $1 billion in property damages annually—don’t be part of the statistic." Tree cutting is far from a routine landscaping task—it's a high-stakes project with real financial and safety consequences. Many people underestimate the expertise required for proper tree felling, leading to common and costly mistakes, especially when using tools like chainsaws or misjudging the felling cut. Data from arborist associations and insurance companies show that most DIY incidents result from improper planning, forgotten safety gear, or neglecting critical elements like the face cut and chain brake. In the United States, property owners face legal responsibility if their fallen branches or trees damage a neighbor’s property—whether by accident or negligence. Local ordinances often require permits, and removal methods can deeply impact not only your finances but also your property value and environmental footprint. From ignoring tree branch lean and decay to using the wrong cutting branches method, the risks add up fast. Before you fire up the chainsaw blade, you need data, expertise, and the right tools: otherwise, a $100 job could become a $10,000 liability. Understanding the nuances of tree cutting is crucial, but even experienced homeowners can overlook key safety steps or local regulations. For a deeper dive into avoiding the most frequent and expensive errors, you may want to review this comprehensive guide on how to avoid costly mistakes in tree cutting, which covers practical tips and real-world scenarios. Why Tree Cutting Matters More Than You Think Little-known risks of tree felling: Fallen trees or limbs can easily harm people, vehicles, and utilities in seconds, especially if the bar tip or chainsaw kickback isn’t controlled properly. Potential legal liabilities of improper tree cutting: Owners can face lawsuits and regulatory fines for damaging neighboring structures or municipal property. Hidden long-term costs: Mistakes in pruning trees or removing the wrong specimens damage landscape aesthetics and even property value. Improper removal also leads to costly stump regrowth. Environmental impacts: The wrong cut increases erosion risk, reduces local biodiversity, and eliminates shade crucial for cooling homes and habitats. What You'll Learn About Tree Cutting The essential steps and safety protocols of tree cutting How to choose the right felling cut and face cut The importance of personal protective equipment How to avoid common tree felling mistakes When and how to hire professionals Understanding the Basics: Tree Cutting, Tree Felling, and Pruning Tree cutting, often used interchangeably with tree felling, encompasses a range of tasks from pruning small tree branches to safely removing entire trees. While the goal may be to clear an area or improve tree health, each technique requires specific tools, safety measures, and expert knowledge. Pruning trees focuses on removing dead or overgrown limbs to promote growth or eliminate hazards. In contrast, tree felling refers to bringing down whole trees, often to prevent future hazards, clear land, or make way for new projects. Knowing when to use a felling wedge or how to make the perfect face cut can make all the difference. Without these distinctions, homeowners risk injury, property loss, and ecological damage. Tree Cutting vs. Tree Felling—Key Differences The primary distinction lies in scope and technique. Tree cutting is any removal of limbs or trunks, performed for maintenance or emergency reasons. Tree felling targets removing an entire tree at ground level, usually with careful planning using methods like the felling cut and face cut. While many attempt tree felling with a standard chainsaw, this process becomes complex with tree lean, obstacles, or decay present. The chain brake and felling wedge are critical safety devices that every professional uses but most homeowners overlook. Knowing when each task is appropriate saves money and prevents damage. Don’t confuse basic trimming with full-scale tree felling. Pruning utilizes shears or hand tools targeted at tree branches, focusing on the crown of blooming trees or maintenance. Full tree felling requires chainsaws, protective gear, and expertise in predicting where the tree begins to fall. In urban and suburban areas, where power lines and property lines complicate things, misjudgments are hazardous and may be subject to liability. Seek guidance from your district office or a reputable tree service for jobs beyond routine tree trimming. Pruning Trees: When and How to Prune Effectively Benefits of pruning methods: Pruning improves air circulation, stimulates new growth, and shapes the tree crown for better light penetration. This results in healthier blooming trees, longer life spans, and reduced disease risks. Safety tips for pruning trees: Always wear personal protective equipment including gloves and goggles. Make cuts on the outside of the branch collar to prevent trunk damage. Use the correct hand tool for the branch size and never cut directly overhead. Common misconceptions about tree cutting and felling cut: Many believe that cutting more branches means faster growth or safety, but over-pruning and poor felling cut execution can lead to stress, instability, or even death of the tree. Follow the right pruning method and avoid removing more than 25% of a tree's live crown in a single season. Planning for Success: How to Prepare for Tree Cutting Choosing Trees for Removal: Assessing Risk and Health Start by evaluating which trees need to go. Look for signs of disease—like mushroom growth near the base, peeling bark, dead upper branches, or hollow trunks. Consider proximity to structures and utility lines; even a healthy tree can be hazardous if it leans toward your home or wires. Severe root damage, cracks at ground level, or repeated storm damage make a compelling case for removal. Always double-check with a certified arborist or your district office if you’re unsure. Some native or protected species require government permission for removal. If your tree or branch seems hazardous, consult local gov website resources or a reputable tree company before proceeding. Save healthy trees where possible—pruning or crown thinning may suffice. Obtaining Permits and Understanding Legal Requirements Almost all municipalities require permits for removing trees above a certain diameter (commonly 6–12 inches in diameter at chest height). Ignoring these requirements can result in steep fines and forced replanting. Before you start tree felling, contact the city’s planning or environmental department—often found on the local gov website or district office. Note that rules vary greatly: urban lots, historic districts, and areas prone to soil erosion may have strict limitations. Special care is required for trees near sidewalks, utility easements, and protected wetlands. Submit permit applications with information on tree size, type, and justification. In some areas, removal of blooming trees or significant landscape features also demands review. Never start work until written approval is received! Site Preparation: Setting Up a Safe Tree Felling Zone A safe felling zone is essential for effective tree felling. Begin by clearing at least two tree-lengths in all directions from the tree’s base, removing cars, furniture, tools, and bystanders. Mark your escape routes—these should be angled away from the expected fall and free of tripping hazards. Check for obstacles in both the fall path and the retreat direction—like fences, power lines, or other trees. Test your tools beforehand, especially the chain brake and felling wedge. Remember, dust and debris from the chainsaw blade can obscure vision and cause injuries. Always have a spotter or second person present. Checklist for site prep and required tools: Confirm fall and retreat paths are clear Face cut and felling wedge location pre-marked Test and adjust chain brake Check quality of personal protective equipment Inspect chainsaw (bar tip, chain tension, air filter) First aid and communication devices ready Essential Tools and Protective Equipment for Tree Cutting Must-Have Cutting Tools (Chainsaws, Felling Wedges, and More) A high-quality chainsaw with an effective chain brake and a sharp chainsaw blade is the core tool for tree cutting. For trees thicker than 6 inches in diameter, you’ll also need a felling wedge to prevent the kerf from pinching the bar tip. Hand tools like pruning saws, pole loppers, and axes help manage higher limbs or smaller cuts—critical for pruning trees safely. Always calibrate the chainsaw, inspect the bar tip for damage, and clean the air filter for maximum performance and safety. Keep a second saw blade on hand in case of pinching or rapid dulling. Secure a hand tool for fine branch work and ensure all tools are in excellent condition—dull or damaged equipment can cause accidents. Personal Protective Equipment: What the Experts Require Helmet and face shield: These protect from falling limbs and flying sawdust, as well as chainsaw kickback. High-visibility vest: Makes you visible to helpers and keeps you safe near traffic or other workers. Chainsaw-proof trousers: Critical for resisting accidental chainsaw contact at leg level. Gloves and boots: Provide a strong grip and shield hands and feet from lacerations and crashes. Chain brake use: Always engage the chain brake when starting, moving, or resting the saw—it’s your most important built-in safety device. Experts insist on full personal protective equipment every time. Skipping any item risks life and limb—literally. Standard gear includes helmets with integrated face shields, earmuffs to block engine noise, and reinforced gloves and boots. Chainsaw-proof trousers are non-negotiable, even for small jobs. Protective equipment is not optional if you value your safety. Step-by-Step Guide: Safe and Efficient Tree Cutting Evaluating the Tree and Its Surroundings Begin every job by examining the tree carefully. Note any signs of decay, cracks, or cavities in the trunk, especially at ground level where weakness is most dangerous. Study the lean of the tree, the weight distribution of the crown, and the direction neighboring branches extend. These factors should guide where you make the face cut and anticipate where the tree will fall. Clear the working area of logs, firewood, and leaves to avoid trips and slips. Assess wind conditions; even a moderate breeze can divert a tree or branch unexpectedly. If power lines are nearby, stop and call the utility company. Safety begins with vigilance—never skip this step. How to Make the Face Cut—Techniques and Best Practices The face cut is the first and most important cut in tree felling. Stand squarely to the side of the tree, not behind, to avoid the danger zone if the chainsaw kickback occurs. Start with a shallow top cut about one-third through the trunk, angled downward, followed by a bottom cut to meet the first, creating a notch pointing towards the intended fall direction. This notch acts as a directional guide, encouraging the tree to fall cleanly and predictably. For trees over 12 inches in diameter, use a felling wedge to keep the kerf open and avoid pinching the bar tip. Ensure chainsaw blade sharpness before starting, and use the chain brake if you need to reposition. Incorrect placement or angles can cause the tree to fall off-course, threatening people and property. Executing the Felling Cut: Avoiding Common Mistakes The felling cut comes next and should be made from the back of the tree, slightly above the bottom notch of the face cut. Work slowly, pausing to insert felling wedges if you detect binding or unexpected movement. Never saw through the hinge wood left by the notch, as this hinge guides the tree’s descent and helps prevent uncontrolled falls. Common mistakes include cutting too quickly, underestimating tree lean, or letting the saw deviate from a level line. Losing focus or neglecting to engage the chain brake when moving around the trunk can result in catastrophic chainsaw kickback. When in doubt, pause, reassess, and proceed methodically. Using Felling Wedges and Chain Brake for Added Safety A felling wedge is vital for keeping the cut open and preventing the trunk from shifting onto the bar tip. Place the wedge in the opening as you progress with the felling cut, gently tapping it as needed to maintain stability. The chain brake should be engaged whenever the saw is not actively cutting—accidental throttle or movement can cause severe injuries. Always have multiple felling wedges and a hand tool (such as a small axe or mallet) nearby to free the saw if stuck. Wedges are invaluable for larger, heavy, or leaning trees, greatly reducing the risk of bar pinching or sudden trunk collapse. Precision and Timing: When to Perform the Final Cut Timing is everything in tree felling. Once the face cut and primary felling cut are made, watch for movement, cracking, or creaking in the trunk and crown. When the tree begins to fall, step sideways down your predefined retreat path immediately. Chainsaw users must release the throttle, engage the chain brake, and move away quickly to avoid unpredictable rebounds or falling branches. If the tree becomes hung up in other branches or stalls mid-fall, never attempt to dislodge it alone. Specialized tools, winches, or professional intervention are often required. The final cut involves clearing any remaining hinge wood only once you’ve confirmed all movement has stopped and the tree is securely down. Common Tree Cutting Mistakes and How to Avoid Them Misusing equipment like chain brake Poor placement of face cut or felling cut Neglecting personal protective equipment Ignoring tree lean and natural fall direction "An incorrectly judged felling cut is the number one cause of DIY tree removal disasters." Mistakes in tree cutting lead to property damage, personal injuries, and sometimes fatal accidents. Misjudgments in the placement of the face cut or felling cut result in trees falling unpredictably, sometimes crashing through fences, homes, or onto power lines. Not using essential personal protective equipment or forgetting to engage the chain brake can cause life-changing injuries, including severe lacerations from chainsaw kickback. To avoid these pitfalls, always follow a checklist, train on safe pruning method and felling technique, and seek expert advice for complex situations or urban environments. Better to spend extra time on preparation than to become a cautionary tale. Special Cases: Christmas Tree Cutting and Urban Tree Removal How Christmas Tree Cutting Differs from Standard Tree Felling Cutting a Christmas tree is generally an easier, smaller scale job than felling large trees in your yard. Christmas trees are typically grown for purpose and removed using basic hand tools such as saws, rather than chainsaws. The focus is less about directional control and more on safe, clean cuts near ground level, preserving as much trunk length as possible for the stand. That said, always check for buried wires or uneven ground before proceeding. Transporting Christmas trees still poses a risk of damaging vehicles or property if not secured properly. Whether you select a tree from a farm or local lot, plan ahead and carry gloves, a saw, and netting. Never underestimate the hazards, even for small trees—personal protective equipment still matters. Urban Tree Cutting Challenges—Wires, Crowded Spaces, and Permitting Urban tree removal introduces complications like power lines, crowded lots, and strict permitting. Trees often overhang homes, driveways, or neighboring properties, making tree felling nearly impossible with basic DIY methods. Professional crews use advanced rigging, cranes, and sometimes even traffic control to minimize disruption and collateral damage. Applying for permits is more involved—multiple city or district offices may have jurisdiction, and there is often a public notice period. Urban jobs should always be handled by licensed, insured professionals—attempting these without training can result in legal consequences and significant danger. When in doubt, contact a local expert or search your municipal gov website for guidance. Cost Considerations and Savings in Tree Cutting How Much Should Tree Cutting Cost? The cost of tree cutting varies widely, from $100 for small, straightforward jobs to over $2,000 for large, complex tree felling jobs in dense neighborhoods or near power lines. Size, location, tree type, and the presence of obstacles all impact pricing—urban tree removal or emergency cutting commands the highest rates. Cutting a christmas tree yourself costs little beyond hand tool rental, while professional crane work is most expensive. Type of Service Professional Cost DIY Cost Notes Small tree removal (<12 inches in diameter) $100 - $500 $50 - $150 (tools rental) Minimal risk if isolated; DIY safe if using proper PPE Medium tree removal (12–24 inches) $400 - $1,200 $100 - $250 Challenging for beginners, check for required permits Large/urban or hazardous trees $1,000 - $2,500+ Not recommended DIY Requires advanced gear, insurance, and often crane support Christmas tree cutting $40 - $150 $20 - $40 Usually DIY, hand tool only The Cheapest Time of Year for Tree Removal Winter and early spring are typically the least expensive times for tree cutting in most regions. Trees are dormant, foliage is sparse, and low demand often leads to off-season discounts from local experts. Scheduling jobs before new growth starts—especially before blooming trees leaf out—simplifies cleanup and minimizes landscape disruption. However, watch out for weather-related risks in icy or wet conditions. Some areas—especially the northern United States—may have frozen ground, providing a firmer surface for heavy machinery and reducing turf damage. Always check with local companies for seasonal specials! How to Get a Tree Removed for Free—Programs and Tips Some utilities, municipal governments, or neighborhood programs offer free tree removal for hazardous trees threatening power lines, sewers, or other infrastructure. Contact your local district office or check the gov website for available grants or volunteer initiatives. Homeowners’ insurance may also cover emergency removal after a storm, especially if the tree or branch fell due to wind or lightning. Additionally, if your tree is suitable for logs or firewood, some companies may remove it free in exchange for the timber. Get multiple quotes and always verify credentials before agreeing to “free” removal offers! Tree Cutting for Beginners: Practical Advice Start with small jobs like pruning trees or removing low-hanging branches before tackling large tree felling projects. Always double-check your personal protective equipment and safety protocols—helmets, gloves, boots, and chain brake before every cut. Learn correct pruning method and safe felling cut from arborist guides or video tutorials. Consult your local district office or extension service for permit advice and site-specific risks. If unsure, hire a professional—one mistake can cause injury or property loss that far exceeds the cost of expert help. People Also Ask—Expert Answers on Tree Cutting How much should tree cutting cost? Professional tree cutting typically ranges from $100 to $2,500, depending on tree size, type, health, proximity to structures, and region. Cutting a small tree with hand tools may cost as little as $50–$150 with tool rental, while large jobs in urban settings demand specialized equipment and insurance, driving up fees. Get multiple quotes and ensure they include debris removal—hidden fees can inflate your final bill. How can I get a tree removed for free? City programs or utility companies occasionally provide free tree removal for hazardous or storm-damaged trees threatening public safety or power lines. Contact your district office, check the local gov website, or consult with your insurer after a severe weather event—relief programs and neighborhood grants may be available. Some firewood suppliers will also cut down suitable trees in exchange for timber. How to cut a tree for beginners? For first-timers, start by assessing the tree’s health and surroundings. Wear all necessary personal protective equipment. Mark a safe retreat path, clear the area, and use a sharp pruning hand tool or saw for small limbs. For full tree felling, make a face cut on the side of the tree facing your intended fall direction, then make a felling cut from the opposite side, using felling wedges if needed. Retreat quickly once the tree begins to fall. If you’re unsure, hire a professional. What is the cheapest time of year for tree removal? Late winter and early spring offer the best rates for tree cutting, with many companies offering off-season discounts before tree trimming and landscaping demand surges. Fewer leaves and dormant trees mean less debris and easier cleanup, often lowering labor costs. Schedule early and request multiple estimates to maximize savings. Frequently Asked Questions About Tree Cutting Is tree cutting always necessary, or can trees be saved? Not always. Healthy trees with minor issues may only need pruning or crown reduction. Only trees with advanced disease, severe lean, or root instability require removal. What tools are best for tree cutting at home? For small tasks, a hand tool or pruning saw is best; for medium jobs, a chainsaw with a reliable chain brake, plus felling wedge and safety gear, is essential. When should I hire a professional for tree felling? Anytime trees are near structures, wires, or other people—or if the trunk is over 12 inches in diameter and you lack experience—always call a pro. What safety risks should I be aware of in tree cutting? Chainsaw kickback, falling branches, unstable trees, and improper retreat routes are the main dangers. Always focus on PPE and planning. How long does it take to cut a tree? Small jobs can take 1–2 hours; large, complicated removals may take a full day with equipment and cleanup. Key Takeaways for Safe and Successful Tree Cutting Prioritize safety and proper planning Understand the type of tree cutting being performed Always use personal protective equipment Be informed about local regulations and costs When in doubt, consult a tree felling expert Empower Your Tree Cutting Skills—Take the Next Step "Knowledge and caution are your strongest tools—don’t let common mistakes cost you your home or your health." Continue your learning Connect with local tree felling professionals Subscribe for updates on pruning trees and best practices Grow your landscaping expertise—call 203-271-7991 or visit TreeGuardianNews.com to subscribe. Conclusion: Proper tree cutting requires planning, training, and respect for safety protocols—protect your home and your well-being by applying these best practices every time. If you’re ready to take your tree care knowledge even further, consider exploring the broader aspects of maintaining healthy, beautiful trees year-round. Our in-depth resource on tree cutting and garden tree maintenance in Connecticut offers expert advice on seasonal care, disease prevention, and sustainable landscaping strategies. By understanding not just removal, but also ongoing tree health, you’ll maximize your property’s value and safety for years to come. Dive deeper into advanced techniques and discover how proactive maintenance can save you time, money, and stress in the long run. Tree cutting is a complex task that requires careful planning and adherence to safety protocols to prevent injuries and property damage. The Centers for Disease Control and Prevention (CDC) provides comprehensive guidelines on chain saw safety, emphasizing the importance of proper equipment use and personal protective gear. Their resource, “Chain Saw Safety,” outlines essential precautions to take before and during tree cutting operations. (cdc.gov) Additionally, the Texas Department of Insurance offers valuable insights in their article “Tree Trimming Safety,” which discusses the necessity of personal protective equipment, hazard identification, and maintaining a safe distance from power lines during tree trimming activities. (tdi.texas.gov) By consulting these authoritative resources, you can gain a deeper understanding of the risks associated with tree cutting and learn best practices to ensure safety and compliance with legal requirements.

09.27.2025

Seasonal Deer Behavior and Tree Damage: What to Expect

Did you know that deer are behind millions of dollars in landscape losses each year across the United States—and much of the destruction to trees and shrubs goes unnoticed until it’s too late? Understanding seasonal deer behavior and tree damage isn’t just for forest managers or park rangers—any homeowner or land steward can benefit from knowing which threats to watch for and the steps necessary to prevent damage and protect their investment in the landscape.A Surprising Look at Seasonal Deer Behavior and Tree DamageDid You Know?—The Hidden Scope of Deer Damage to Trees and Shrubs"Each year, deer are responsible for millions of dollars in landscape losses across the U.S.—and much of the damage goes unnoticed until it’s too late."Landowners often underestimate how relentless and far-reaching deer can be. Deer damage affects ornamental gardens and woodlands alike, and the aftermath often extends beyond visible browsing. A lush, tranquil backyard one day can turn into a patchwork of stripped branches and battered stems the next. This silent threat endangers young trees, mature tree trunks, and vulnerable flowering shrubs. With a growing deer population in suburban and rural areas, it’s crucial to recognize how these behaviors surge and shift through the seasons, directly impacting the health and lifespan of your trees and shrubs.What You’ll Learn About Seasonal Deer Behavior and Tree DamageKey insights into seasonal deer behavior and tree damageThe relationship between deer habits and the health of trees and shrubsHow deer damage varies by season and type of treePreventative and restorative practices for homeowners and land managersUnderstanding Seasonal Deer Behavior and Tree DamageHow Deer Behavior Fluctuates With the SeasonsThe habits of deer change as the seasons progress. Seasonal deer behavior is driven by factors like food availability, breeding, and environmental conditions. In early spring, hungry deer emerge from harsh winters in search of tender new shoots, often targeting the fresh growth on young trees and shrubs. Summer brings further browsing as both fawns and adult deer rely on abundant greenery, while the onset of fall introduces rutting—male deer use antler rubs and antler rubbing on tree trunks to mark their territory and prepare for mating season. This aggressive contact with tree bark during these periods can tear and expose vital cambium layers.In the winter months, as food becomes scarce, deer become far less selective, browsing heavily on evergreen species and repeatedly damaging the same plants. This seasonal cycle accelerates the decline of unprotected trees and shrubs, particularly those growing at forest edges or in newly landscaped areas. Not only does this browsing reduce aesthetic value, but it also impacts the overall vitality and lifespan of the trees and shrubs involved.Why Deer Damage Peaks in Certain MonthsDeer damage tends to peak during specific times depending on the lifecycle needs of the local deer population. During fall—especially September through November—antler rubbing and rut-related activity are at their zenith. Bucks rub their antlers on tree trunks with surprising force to shed velvet and mark their territory, which can strip bark and cut deep wounds into young tree stems. Conversely, late winter and early spring are notorious for intense browsing as food reserves dwindle, leading deer to strip bark and buds from any available young trees and shrubs.These high-risk windows highlight the importance of vigilance and proactive strategies. Trees at the forest edge or recently planted specimens lacking mature bark thickness are particularly vulnerable during these periods. Over time, repeated episodes of deer browse and antler rubbing can drastically alter the architecture and health of a landscape, underscoring the necessity of deer damage prevention methods for young and mature plants alike.Seasonal Deer Behavior and Tree Damage Impact TableSeasonCommon Deer ActivitiesTypical Tree DamageVulnerable Trees and ShrubsSpringNew growth feedingBrowsed buds/leaves, broken tipsFlowering and fruiting varietiesSummerContinued browsingLeaf stripping, some bark injuryYoung trees, shrubsFallRutting and antler rubbingBark stripping, antler rubYoung tree trunks, saplingsWinterScarce food, aggressive browsingSevere bark stripping, twig breakageEvergreen and young treesIdentifying Deer Damage: Trees and Shrubs at RiskHow to Recognize Damage to Trees and ShrubsSpotting deer damage early can spare homeowners and land managers costly replacements. Some common indicators of deer browsing include torn leaves and stripped buds, where the jagged edges appear rather than clean cuts from pruners. A key sign is bark shredding or the presence of shiny, smooth patches from deer rubs or antler rubbing. These marks are especially visible on young tree trunks and saplings. Additionally, trampled or broken stems and misshapen young trees are telltale results of repeated deer visits. Observing such symptoms in your trees and shrubs is a signal to act quickly to prevent further damage to trees.Torn leaves and stripped budsBark shredding from deer rubsBroken branches and trampled stemsMisshapen young treesDeer Rub and Antler Rubbing: Signs and Effects"Antler rubs can permanently compromise the structure of a young tree, making early detection and management critical." – Tree care experttheir antlers on young trees during late summer and fall, leaving visible wounds. This act, called antler rubbing, not only removes bark but can girdle trees, interrupting the flow of nutrients and leading to permanent deformities or death. You'll notice patches where the bark is scraped away, sometimes exposing wood and leaving ragged fibers around the wound. Older trees may tolerate some damage, but small trees and saplings are particularly susceptible.Repeated antler rubs encourage fungal infections and pest invasions. Even single events can open pathways for disease or lead to structural weakness in the tree trunk. Routine checks—especially in the weeks before and during mating season—are the best way to ensure you spot and address the problem before further harm occurs.The Lifecycle of Young Trees and Young Tree DamageWhy Young Trees and Young Tree Growth Attract DeerYoung trees and new plantings are some of the most attractive targets for deer. Their tender bark and shoots offer higher moisture and nutrient content, making them more palatable. Proximity to forest edges or open fields where deer naturally forage increases risk. Without barriers such as tree guards or fencing, new growth often faces rapid decline due to repeated browsing and rubbing. This cycle is exacerbated in nursery landscapes and restoration zones where protective measures may be inconsistent.Tender bark and shoots are easier to browseProximity to forest edges increases riskInadequate protection from deer led to accelerated damageLong-Term Impacts: Damage to Trees at Every Growth Stage"The first few years are the most precarious for young trees—deer damage at this stage can mean the difference between thriving and failing."The first three to five years of a young tree’s life are the most critical. Damage inflicted by deer during this window—whether from repeated deer browse, broken branches, or antler rubs—can result in poor structure, increased disease susceptibility, or death. Without prompt action, even seemingly minor wounds become entry points for insects and fungal diseases, or cause stunted and misshapen growth as the plant tries to compensate for lost tissue or compromised bark.For established trees, frequent antler rubbing or heavy winter browsing can reduce overall vigor and productivity, weakening the tree over time. Proactive care—including using tree guards, netting, or selecting more deer-resistant varieties—remains the best defense for protecting trees and shrubs throughout all growth stages.People Also Ask: What Time of Year Do Deer Damage Trees?Seasonal Insights: High-Risk Periods for Tree DamageHomeowners most frequently observe deer damage to trees in mid-fall, coinciding with the rut—or deer mating season—when bucks become more active and territorial, increasing instances of antler rubbing. Another peak arrives during the winter months when natural food resources dwindle, pushing deer to aggressively browse both young trees and evergreens. These high-risk periods require extra attention to monitoring and prevention.Answer:Deer are most destructive to trees and shrubs during the fall and winter. In fall, antler rubs and territorial behavior do the most harm, while in winter, food scarcity compels deer to strip bark and browse twigs. Taking measures to prevent deer damage before these periods can greatly reduce the risk to your landscape.People Also Ask: How Do Deer Affect Trees?Ecosystem Perspective: Cumulative Effects of Deer DamageDeer are a natural part of the ecosystem, but when populations surge, their impact on trees and shrubs becomes unsustainable. Chronic deer browse removes biomass, weakens growth, and can deplete undergrowth in forests, leading to less diverse habitats. Such pressure not only damages individual young trees and specimens in landscaping but can also alter local plant communities and increase the spread of invasive species. This cumulative effect may take years to manifest, but proactive intervention is key.Answer:Repeated browsing, antler rubbing, and branch breakage caused by deer impede healthy tree growth. Over time, this disrupts nutrient flow, destabilizes tree architecture, and exposes trees to further disease and pest attack. Both ornamental and woodland species can suffer substantial damage to trees from sustained deer activity.People Also Ask: Will Plants Recover From Deer Damage in the Winter?Winter Resilience and Recovery Potential for Trees and ShrubsWhile some trees and shrubs are resilient to occasional deer damage, winter months make recovery difficult. The cold slows cellular activity and healing. Severe bark stripping or bitten buds can delay—or even prevent—spring recovery. However, prompt action, such as pruning damaged parts and applying wound dressings, can aid in healing and boost recovery chances once growing conditions return.Answer:Recovery is possible if the damage is mild and caught early. Heavily browsed or girdled young trees are less likely to survive winter damage, whereas established trees can sometimes rebound with proper intervention come spring.People Also Ask: How to Repair Trees Damaged by Deer?Treatment and Prevention Strategies for Deer DamageRepair starts with inspection—remove ragged or broken branches with clean cuts to minimize disease risk. Where bark is stripped, gently press loose bark against the wound if possible or trim back to healthy tissue to promote healing. Apply tree guards or fencing immediately to prevent repeat incidents. For severe antler rubbing, consider using mesh or wire cylinders to protect trunks. Proactively choosing deer-resistant trees can help long term, while repellents create an additional deterrence layer.Answer:Clean cuts, wound painting, and physical barriers are the primary repair strategies. Persistent problems may require replanting with less vulnerable species and continuous observation, especially during times of high deer activity.Effective Deer Damage Prevention for Young Trees and ShrubsInstall physical barriers or fences—wire fencing and durable netting offer top protection.Apply repellents suited for local deer populations and refresh often, particularly after rain or heavy dew.Choose deer-resistant trees and shrubs for landscaping projects whenever possible.Monitor and maintain tree guards and protective cylinders, with extra vigilance during fall and winter when risks are highest.Watch: A tree care professional walks you through identifying antler rubbing on tree trunks, distinguishing deer impact from other causes, and what to do when you spot new damage.Learn: Step-by-step guidance on placing fences, tree guards, and netting to prevent deer from reaching vulnerable young trees in every season.FAQs: Seasonal Deer Behavior and Tree DamageWhich trees are most susceptible to deer damage?Answer: Tender, young trees, saplings, and soft-barked varieties like fruit trees, maples, and dogwoods are most at risk, especially on landscapes near woods or open fields.Can deer damage be reversed?Answer: Minor damage might heal over time with proper care; severe bark stripping or recurring deer rubs can be fatal, making prevention essential.What are the best long-term solutions for deer control?Answer: Consistent use of fences, tree guards, and selective planting of deer-resistant species are proven to minimize deer browse and protect investments year after year.Key Takeaways: Managing Seasonal Deer Behavior and Tree DamageSeasonal deer activity peaks mid-fall and winter, heightening risk to young trees.Early intervention and prevention can significantly reduce damage to trees and shrubs.Understanding deer habits enables better landscape planning and protection.Conclusion: Protecting Trees From Seasonal Deer Behavior and Tree DamageSummary of Actions for Tree and Shrub HealthSafeguarding your landscape from seasonal deer behavior and tree damage is an ongoing process—stay vigilant, invest in proven protection strategies, and respond swiftly to any signs of deer damage.Ready to Protect Your Landscape? – Grow your landscaping expertise—call 203-271-7991 or visit TreeGuardianNews.com to subscribe.To deepen your understanding of how deer behavior varies seasonally and its impact on trees and shrubs, consider exploring the following resources:“Orchard Wildlife - Integrated Management of White-Tailed Deer”: This article provides insights into the seasonal feeding habits of white-tailed deer and offers strategies for managing their impact on orchards. (extension.psu.edu)“How to Protect Trees and Shrubs from Animal Damage Over the Winter”: This guide outlines effective methods to safeguard trees and shrubs from deer damage during the winter months, including the use of physical barriers and repellents. (extension.iastate.edu)By consulting these resources, you’ll gain valuable knowledge on mitigating deer-related damage to your landscape throughout the year.

Terms of Service

Privacy Policy

Core Modal Title

Sorry, no results found

You Might Find These Articles Interesting

T
Please Check Your Email
We Will Be Following Up Shortly
*
*
*